Pumpkin Chocolate Chip Muffins

Pumpkin and chocolate chip is one of the most iconic yet underrated combos in baking history. I was trying to think of a music analogy, and the closest thing I could think of are Marvin Gaye and Tammi Terrell duets. Everyone knows and loves “Ain’t No Mountain High Enough,” but have you heard, “Ain’t Nothing Like The Real Thing“? I’m not saying it surpasses it, but it is way more intriguing and full of depth.

ANYWAY. Before I feel like I’m writing a dissertation on music and muffin analogies, I’ll tell you more about these pumpkin chocolate chip muffins. They were basically born because I had leftover pumpkin puree from a pumpkin spice cake I made a few weeks ago, and I wanted to use it up. Also, I was craving chocolate chips. I decided to throw everything into the mixer this morning to create these pumpkin muffins.

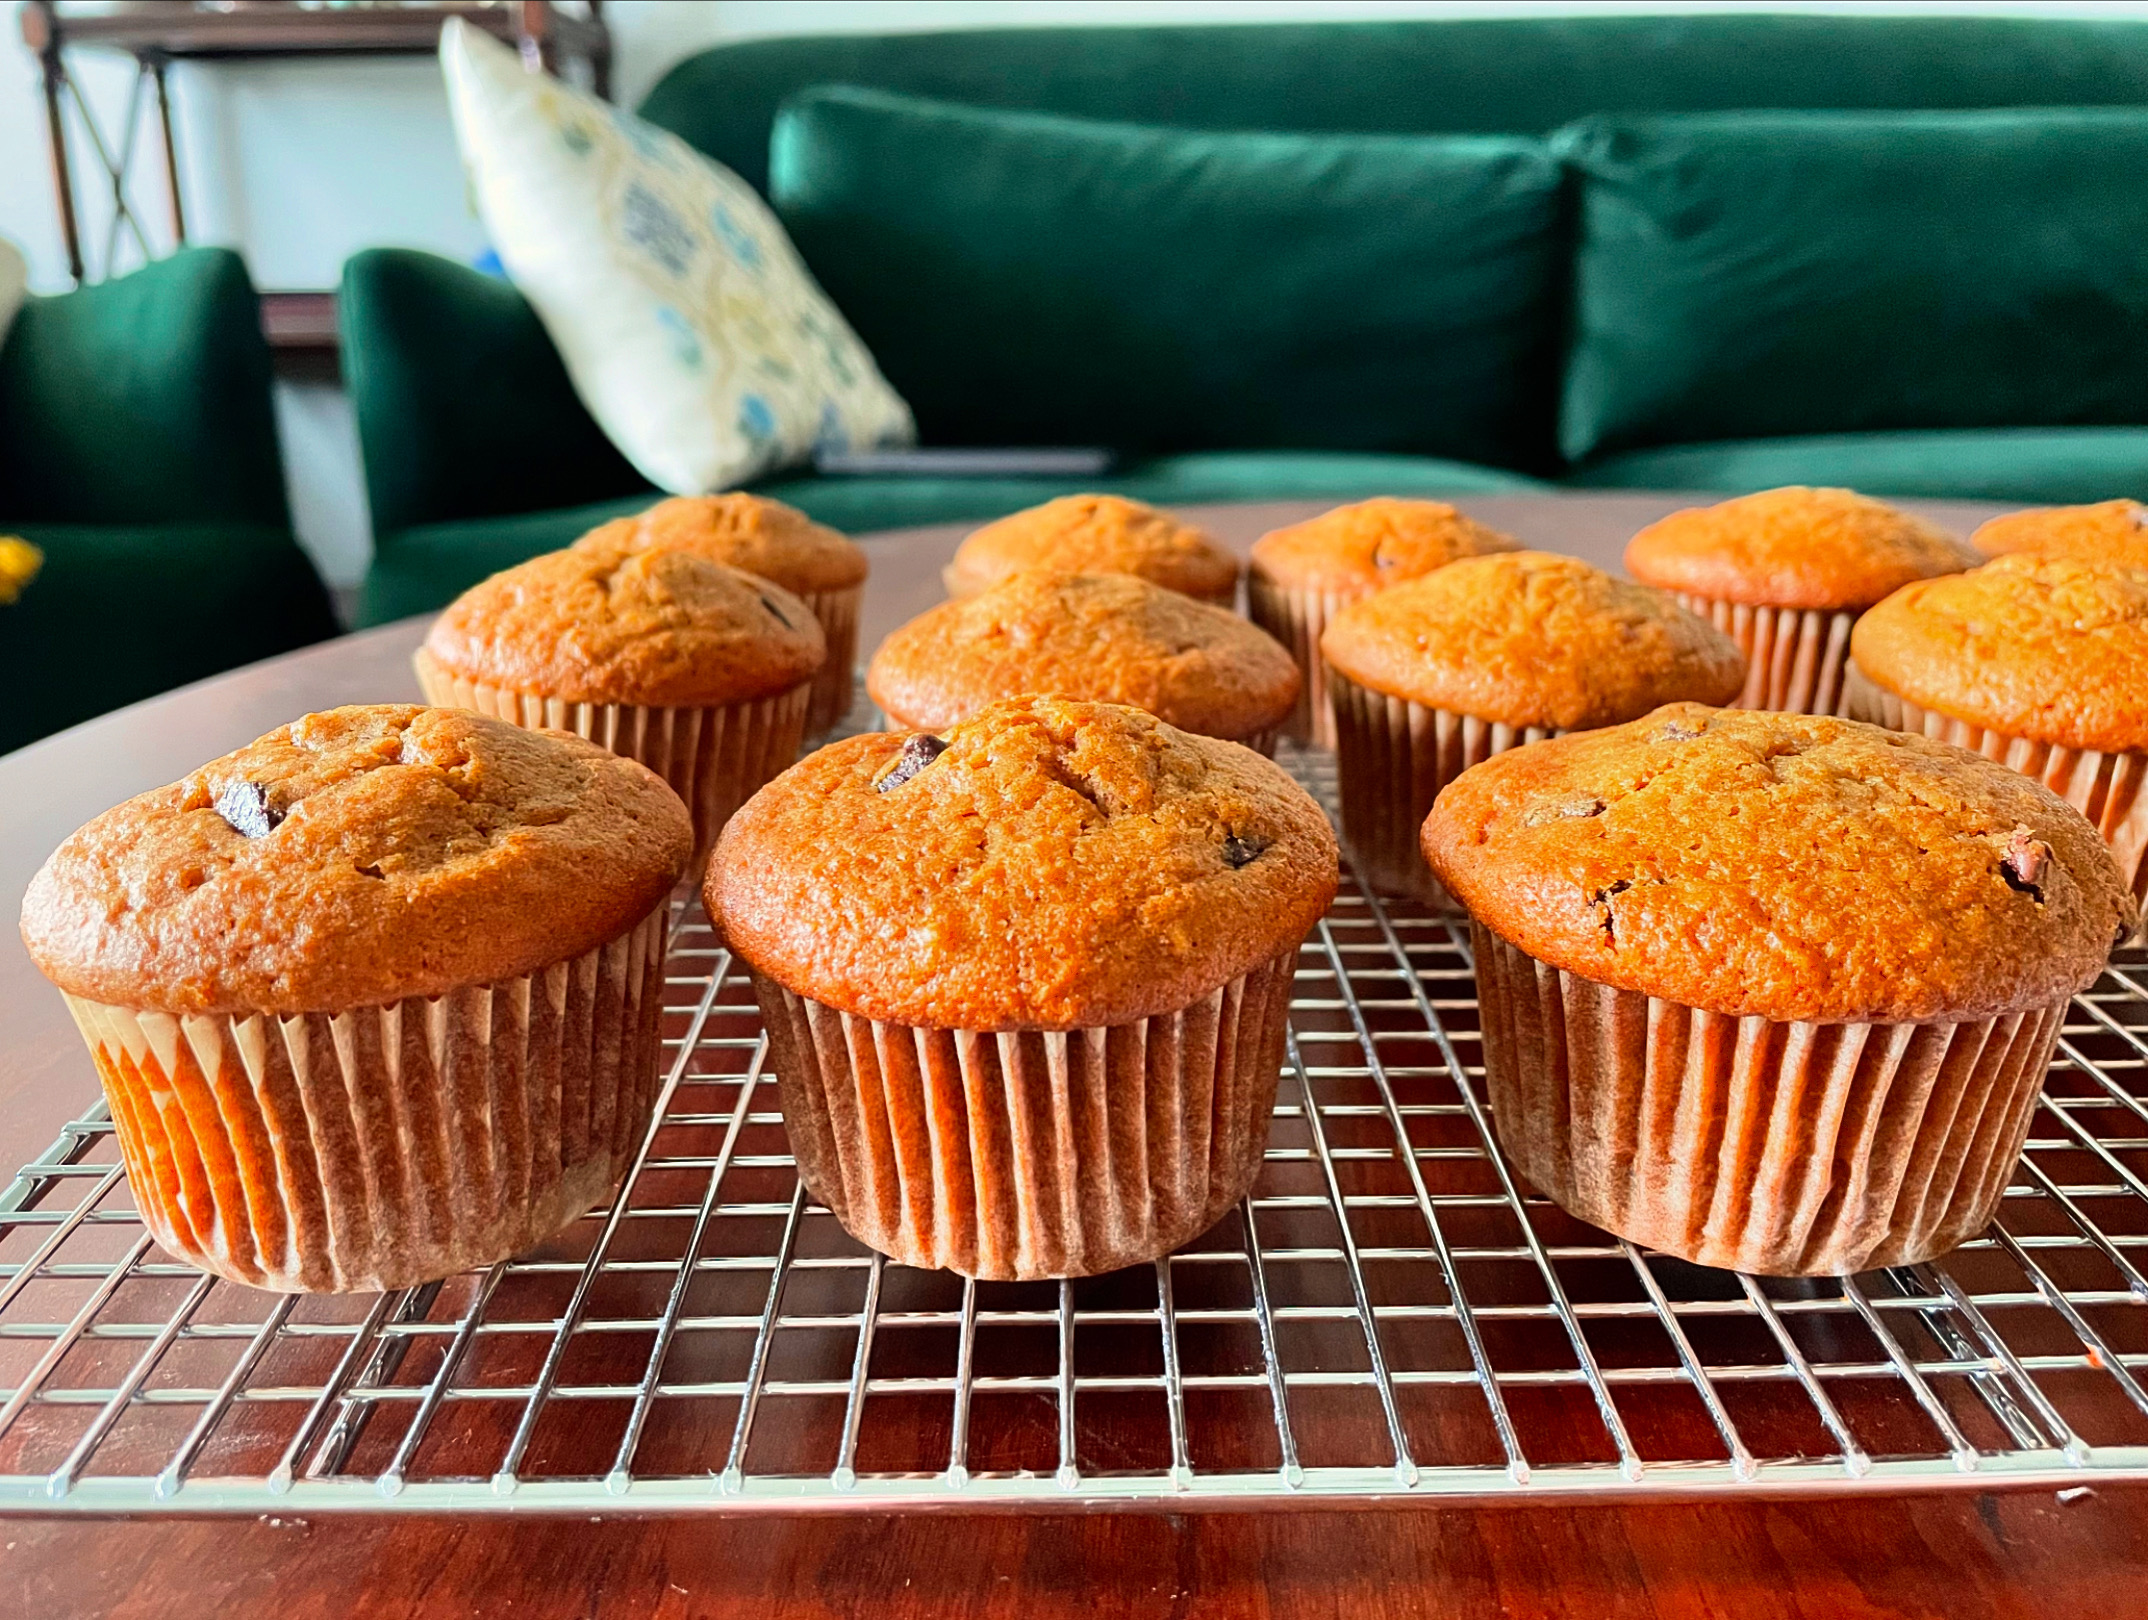
My favorite thing about baking with pumpkin is that without fail, the end product will smell and taste like a doughnut. I guess it has something to do with the starch of a pumpkin, but I’m not a food scientist, so I’ll leave the pondering there. Smelling these muffins after they came out of the oven was a somewhat surreal experience, a cross between stepping into a doughnut shop and lighting a pumpkin candle.

Also, the chocolate: I like dark chocolate chips in pumpkin baked goods, but semi-sweet will work just as well. I actually used semi-sweet this time because they were all out of dark chocolate chips at the grocery store. The chocolate chips add a little more sweetness but are happy to sit back and let the doughnut-like pumpkin muffins be the star of the show.

These go great with a cup of strong coffee or tea. I imagine they’d freeze well, too, so you could pop some in the freezer and reheat them throughout the week for breakfast or basically whenever. There is no wrong time to eat a muffin.

Here’s a song (and another duet) to get you started on your pumpkin chocolate chip muffins journey. I was just thinking about it yesterday when I went to get tacos at the farmers’ market from my friends at Brew Tulum and I asked for a little of everything on top. “A little bit of this, a little bit of that,” I said. “Isn’t that a song?” the owner exclaimed, and started singing the chorus with me. I love impromptu karaoke.

Pumpkin Chocolate Chip Muffins

Ingredients
1 3/4 cups all-purpose or gluten-free all-purpose flour with xanthan gum
1 1/2 tsp baking powder
1/2 tsp baking soda
2 tsp ground cinnamon
1/4 tsp salt
1/4 tsp ground nutmeg
1/4 tsp ground ginger
2 large eggs
2/3 cup packed dark brown sugar
1/2 cup sugar
1/2 cup vegetable oil
1 tsp vanilla extract
1 1/4 cups fresh or canned pumpkin puree
half a bag of semi-sweet or dark chocolate chips

Directions

Preheat the oven to 350 degrees F. Line a muffin pan with 12 paper liners and set aside. Whisk together the flour, baking powder, baking soda, ground cinnamon, salt, ground nutmeg, and ground ginger in a large bowl. In the bowl of a stand mixer, whisk together the eggs, sugars, vegetable oil, and vanilla extract. Whisk in the pumpkin puree until smooth. Add the flour mixture a little bit at a time until everything is combined. Fold in the chocolate chips with a spatula.

Use an ice cream scooper to scoop the batter into the prepared muffin tin, filling each liner until it’s almost full. Bake the muffins for 18-22 minutes or until the tops spring back to the touch. Remove the tin from the oven and allows the muffins to cool for five minutes in the tin before cooling them the rest of the way on a wire rack. Enjoy!
Posted in Breakfast, Brunch, Gluten-Free, Muffins | Tagged , , , , , , , , , , , , , , | Leave a comment

Monster Cupcakes

Halloween is low key one of my favorite holidays. I say “low key” because I haven’t really celebrated it in years, beyond giving a bucket load of candy to children who come by my house for trick-or-treat, carving pumpkins, and putting fake eyes on baked goods.

However, there is so much more to love about the holiday. Around October 1st, buckets of candy start showing up everywhere. There was even one at my yoga studio. “It’s candy season!” I exclaimed after coming out of class the other day, and an old lady laughed. I also got into a somewhat heated debate with my yoga teacher and the owner of the studio about why tootsie rolls are the worst Halloween candy ever invented. “How can you not like tootsie rolls?” the owner of my studio said. “They’re like chocolate wax.” “You’re proving my point,” I said.

ANYWAY. I digress. I think the reason why I love Halloween is because it gives you an excuse to be whimsical, if you couldn’t find one already. I love costumes. I love celebrating essentially nothing (honestly…what is Halloween about?), and I love eating enough candy and sweet things to make you want to puke.

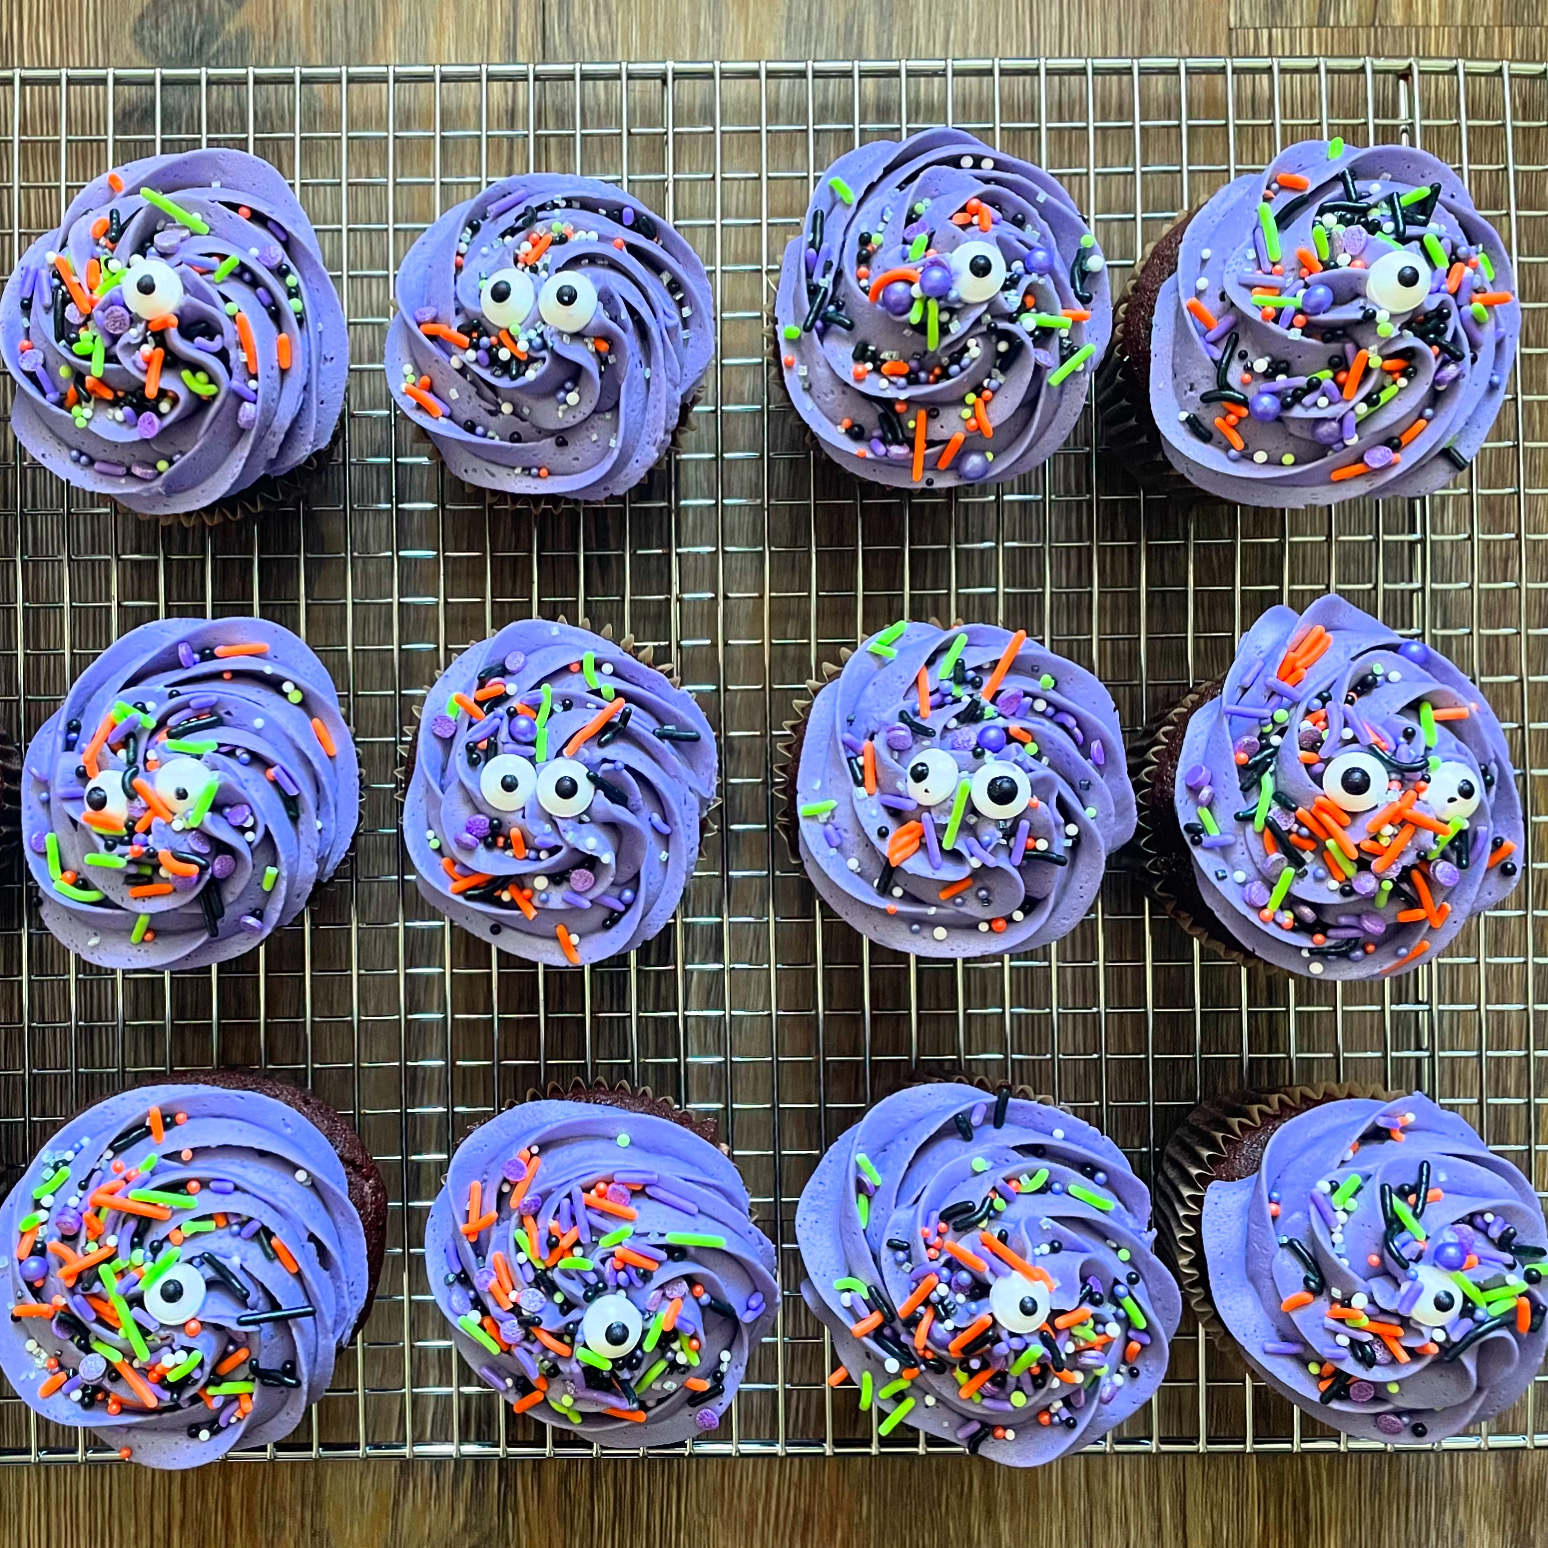
Which brings me to these cupcakes. They were originally going to be chocolate cupcakes with chocolate frosting and sprinkles, but then I decided to go for it and make them monster cupcakes. Basically, the only thing that changed was the chocolate frosting became “monster” frosting, i.e., dyed purple with food coloring.

I’m glad I went for it because when I look at the cupcakes on my counter, they make my inner child happy. I can’t wait to share them with everyone at work tomorrow. If your baked goods aren’t looking back at you on/around Halloween, it’s probably a good sign that you need to go deeper into spooky season.

Here’s a song to get you started on your monster cupcakes journey.

Monster Cupcakes

Ingredients

for the cakes:
2 cups sifted all-purpose or gluten-free flour
1 tsp baking soda
1/4 tsp salt
1/2 cup unsweetened cocoa powder
2/3 cup unsalted butter (1 1/3 sticks), softened to room temperature
1 tsp vanilla extract
1 1/2 cups granulated sugar
3 eggs
1 cup milk

for the buttercream frosting:
1 cup unsalted butter, softened to room temperature
1/4 tsp salt
1 lb (454 grams) powdered sugar, sifted
1 Tbsp vanilla
3 Tbsp heavy whipping cream
purple food coloring

Directions

Preheat the oven to 350 degrees F and line two muffin tins with paper liners. In a large bowl, sift the flour and whisk in the baking soda and salt. Sift the cocoa powder into the same bowl and whisk everything to combine it.

In the bowl of a stand mixer fitted with the paddle attachment, beat the butter until it’s lighter colored and a creamy consistency. Add the vanilla extract and sugar and mix to combine. Add the eggs one at a time, beating after each addition. Use a spatula to scrape the sides and bottom. Then, add the dry ingredients alternating with the milk until you’ve added them all. Give the mixture one more stir with the spatula, scraping the sides and bottom and mixing again as needed to make sure everything is combined.

Scoop the batter into the prepared muffin tins, filling each cup 2/3 full. Bake the cupcakes until the tops spring back to the touch, about 25 minutes. Let them cool in the tin for five minutes before removing to a wire rack to cool the rest of the way. Do not ice the cupcakes until they’re completely cool.

While the cupcakes are cooling, make the frosting. In the bowl of a stand mixer fitted with the paddle attachment, beat the butter and salt for about a minute. Then add the sifted powder sugar in batches, mixing on the lowest setting and using a spatula to scrape down the sides and bottom as needed. Once it’s mostly combined, add the vanilla and a tablespoon of heavy cream at a time. Increase the speed of the mixer and beat everything until it’s light and fluffy.

To make the frosting purple, add the purple food coloring one drop at a time, beating after each addition, until the frosting is your desired color.

Pipe the frosting onto the cooled cupcakes and top with sprinkles. Enjoy!

Posted in Cupcakes, Dessert, Gluten-Free | Tagged , , , , , , , , , , , | Leave a comment

Chicken Milanese

Today marked two milestones for me: I made one of the best dinners of my life, and I set off the fire alarm for the first time in my new apartment.

Sometimes, we have to take the bitter with the sweet.

I was supposed to have my friends (a married couple) over for dinner tonight, but then one got sick. I had all the ingredients to make Chicken Milanese so I decided to forge ahead. It’s been a while since I’ve cooked chicken at home. I’m not a vegetarian, but I’m not a big poultry or meat eater, either, so I was a little apprehensive as to how it would turn out. I’m a good cook, but sometimes cooking with a certain ingredient is like riding a bike when you haven’t been on one for a while. It can be awkward, but you get back into the swing of things quickly.

There are three keys to making really good Chicken Milanese: One, use fresh ingredients. You’re essentially putting a salad on top of fried chicken, so it helps to have the freshest tomatoes, lettuce, and cheese possible. The tomatoes make their own salad dressing, because you toss them with some lemon juice, olive oil, salt, pepper, and a mashed clove of garlic, and let it all sit for a while you work with the chicken.

Two, pound the chicken breasts really, really thin. It had been probably at least half a decade or more since I used a meat mallet, and let me tell you, it was cathartic. If you have any frustration or anguish, take it all out on the chicken. I’m not going to lie to you: I probably took out a little too much frustration because there were chicken shards (is that a thing?) on my shirt, but that’s okay, because the breasts got flattened, which made them easier to bread and fry.

Finally, watch the frying oil carefully because things can change in a hot minute. I ended up having to get out a second pan and heat up a second batch of oil after I set off the fire alarm and was running around my apartment opening every window and blasting the vent fan. Was it a little traumatic? Maybe. Was it worth it? Yes.

All’s well that ends well because after the smoke plumes, slight oil fire, and delay in frying, I was rewarded with perfectly crispy fried chicken on a bed of lettuce, basil, and fresh tomatoes in their dressing. I thought of a line from one of my favorite writers, Virginia Woolf: “One cannot think well, love well, sleep well, if one has not dined well.” Well, I’ve dined well tonight. I can honestly say I feel better overall, which only proves Virginia’s point.

Here’s a song to get you started on your Chicken Milanese journey.

Chicken Milanese

Ingredients

for the salad:
2 pints assorted cherry tomatoes cut in half
1 clove garlic, smashed
juice from one large lemon
kosher salt and freshly cracked black pepper to taste
1/2 cup extra virgin olive oil
8 oz mixed greens or arugula
1/2 cup loosely packed fresh basil leaves
grated Parmesan cheese for serving

for the chicken:
2 ½ cups panko breadcrumbs
2 cloves garlic, finely minced
3 Tbsp finely minced fresh parsley
1/2 tsp kosher salt
1/2 tsp freshly ground pepper
1 cup finely grated Parmesan cheese, divided
4 large eggs
1 cup all purpose flour
2 lbs boneless, skinless chicken breasts, thinly sliced
vegetable or canola oil for frying

Directions

First, start the salad. Toss the cherry tomatoes with the garlic, lemon juice, salt, black pepper, and olive oil in a large bowl. Set aside until later.

Next, work on the chicken. Thinly slice the chicken breasts. Use a meat mallet and a cutting board to beat the breasts to 1/2 inch thick. Season both sides of each breast with salt and pepper and set aside on a plate.

In a medium shallow bowl, toss the breadcrumbs with the minced garlic, parsley, salt, pepper, and about half the grated Parmesan cheese. In another medium shallow bowl, whisk the eggs with the rest of the grated Parmesan cheese, a little salt and pepper, and a tablespoon of water. Spread out the flour in another medium shallow bowl.

Assemble your chicken station so the plate with the seasoned, flattened chicken breasts are on the left, the bowl with the flour is next to it on the right, the bowl with the egg mixture is to the right of that, and the breadcrumb mixture is on the very end at the far right. Place a baking sheet to the right of the breadcrumbs so you can place your breaded chicken there once it’s done. Use a spatula to flip your chicken in the flour, shaking off any excess. Do the same thing with the egg mixture. Flip the floured, egged chicken into the breadcrumb mixture, making sure you press down on both sides so the breadcrumbs adhere better to the chicken. Place the breaded chicken on the baking sheet.

Once you’re finished breading all the chicken, heat up a generous pour of vegetable or canola oil in a large skillet on medium high heat. I would start with medium heat because you don’t want it too hot. Once the oil is heated, start frying your breasts a couple at a time. Do not crowd the pan. Flip the breast over when one side is golden brown, and cook the other side until it’s the same color. Remove the fried chicken to a wire rack placed on top of a baking sheet, or you can set it on a plate. Repeat until you’ve fried all the chicken.

When you’re ready to serve, remove the mashed garlic from the bowl with the tomatoes. Spoon out some dressing and toss it with the salad leaves and basil. Put the dressed salad greens and tomatoes on a plate, sprinkle on some grated Parm, and nestle in the fried chicken. Enjoy!

Posted in Dinner | Tagged , , , , , , , , | Leave a comment

Pizza Break: Pizza Via

Seven years ago after I moved back to St. Louis from DC, I decided to stop by Pizzeoli in Soulard after work. I hadn’t lived in St. Louis for an extended time since college, so I made it my mission to catch up on all the restaurants I’d missed. Pizzeoli was high on the list because pizza is one of my favorite foods of all time.

Also, I’d heard good things. There were whisperings around town that Scott Sandler, the proprietor, was something of a pizza wizard. He made Neapolitan-style pizza in a way no one in town had before. I was eager to try it, especially because I had yet to find really good Neapolitan-style pizza in St. Louis. I missed the chewy crust, the simplicity of the toppings, and the slightly charred flavor that comes from the wood-fired oven.

I got to Pizzeoli in Soulard, sat at the counter, and ordered a beer and a Margherita pizza. I still remember eating it to this day. It was so good, I almost blacked out for a second. “Wow,” I thought to myself. “This guy knows what he is doing.” The toppings were fresh and the crust was perfectly cooked. There was just the right amount of cheese and sauce. Because I had done my research, I looked over and recognized Scott operating the pizza oven not too far from where I was sitting. I struck up a conversation and learned more about how he got into the pizza business and his commitment to the craft.

Flash forward a few years: Scott decided to sell Pizzeoli to focus on his New York-style pizzeria, Pizza Head. I ran into him at a local lunch joint one day, and he asked me if I wanted to help him with a bagel pop up. I said yes, definitely, for a few reasons: One, there were no good bagels in St. Louis at the time, and I desperately wanted one. Two, I wanted the experience of doing a pop up, because a part of me to this day dreams about having my own café or eatery. Three, I thought it was a great business idea. I knew a lot of people would show up to buy bagels, and I told Scott that.

The bagels sold out in record time. Based on the success of the pop up, Scott started selling the bagels at Pizza Head. Then, that little thing called COVID happened. Scott sold Pizza Head, and I started wonder when I would ever have his pizza again.

Then I saw him start posting on Instagram earlier this year about his new restaurant, Pizza Via, in the Central West End. I went on opening weekend to check it out. The modest shop churns out some of the best pizza I’ve ever tasted. Scott said the oven is more West Coast-style than Neapolitan-style, but the effect is nothing less than extraordinary: Light, delicious pies with chewy crusts and just enough char around the edges, all with fresh toppings. I could eat a whole pizza by myself in one sitting, which makes sense because they’re on the smaller side. However, I usually save a couple slices for the next day to make it last longer.

My favorite pie at Pizza Via is the Spinach Pie, which is somewhat shocking and a testament to how good it is. I used to say that pizza only tasted good with tomato sauce. I would *never*, I mean never, order any pizza without sauce. But after I saw my friend try the Spinach Pie, I decided to give it a go. It has fresh spinach, aged and fresh mozzarella, Parm, oregano, and balsamic glaze. I tried it once and I’ve gotten it every time since. The balsamic takes it to the next level. I don’t even miss the red sauce. I’d also recommend getting it with a drizzle of Mike’s hot honey, which takes it to an even higher level. Salty, sweet, spicy, and a little acidic with the balsamic drizzle. What more do you need in life?

Before I get too carried away, I’ll leave you with the recommendation to check out Pizza Via as soon as possible. When you try the pizza, you’ll realize you’re not just grabbing a pie after work to scarf down because you need food. You’re experiencing a work of art. Everyone should have this experience at least once in their life.

Posted in Pizza Break, Restaurant Reviews | Tagged , , , , | Leave a comment

Pumpkin Spice Cake

This pumpkin spice cake was born from a recipe I got delivered to my inbox about a month ago. I am a huge fan (some might say, super fan) of Aran Goyoaga and her cookbooks. It’s only a slight exaggeration to say that she completely changed the way I view gluten-free baking.

I first came across Aran’s recipes by landing on her food blog, Cannelle et Vanille, almost two decades ago. Her food photos drew me in, and her recipes kept me coming back for more. At that point in my life, I was a relatively novice baker, and gluten-free baking wasn’t as mainstream as it is now. I was intrigued by her recipes, but I was also a little intimidated, because I hadn’t heard of or seen half the ingredients she was talking about.

However, as the years went on, I started seeing more gluten-free flours on the shelf at the grocery store. I realized that gluten-free baking doesn’t have to be this abstract, intimidating process. It’s really the same as regular baking: It’s all about ingredients and proportion. If you’re nervous about baking something gluten-free, I would recommend starting with one of Aran’s recipes because she has tested them thoroughly. All the ingredients are lined up to create something truly delicious. Honestly, you probably won’t even notice it’s not full of gluten.

Aran’s food blog isn’t active anymore, but she has three wonderful cookbooks, two of which I own, and she has a newsletter that I signed up for a while back. About a month ago, I got a recipe from Aran for a roasted kabocha squash cake. I must have mentally filed it away, because earlier this weekend when I was trying to decide what to bake, it popped into my mind.

I used Aran’s notes and my preferences to craft my own recipe. She mentioned that the original recipe had almond flour and brown rice flour, so I decided to go with that instead of using her recipe to make the cake grain-free, which would require additional types of flour. I also used a pie pumpkin instead of the kabocha squash because I knew I wouldn’t be able to find kabocha squash anywhere. I could have also used butternut, but I saw the little pie pumpkins at the farmers’ market and they were calling my name.

Honestly, I’m a path of least resistance person when it comes to roasted squash puree. You will never find me sitting here saying, only use squash that you roasted in your oven for an hour plus and mashed by hand. I love canned pumpkin as much as the next person, and in future iterations of this recipe, I might use it. Feel free to sub that in if you’re short on time or you don’t want to go through the rigamarole of roasting a whole squash.

This cake smelled like a doughnut when it came out of the oven. I sprinkled a little extra sugar on top, which made me want to eat it even more. However, I’m holding myself back because I want to share it with everyone at work tomorrow. We’ll see how long I can be patient. I’m a very impatient person, so I’ll give it another hour.

Here is a song to get you started on your pumpkin spice cake journey. I think it really speaks to fate and how everything works out for the best.

Pumpkin Spice Cake (adapted from Aran Goyoaga’s Grain-Free Roasted Kabocha Squash Cake)

Ingredients
1 medium pie pumpkin
150 g sugar, plus more for sprinkling
80 g maple syrup
3 large eggs
110 g extra-virgin olive oil, plus more for greasing
105 g superfine brown rice flour
100 g almond flour
2 tsp baking powder
1/4 tsp ground cardamom
1/4 tsp ground cinnamon
1/2 tsp kosher salt

Directions

Preheat the oven to 400 degrees C. Slice the pie pumpkin in half and place it cut side down on a baking sheet. Roast it for about an hour or until the flesh is easily pierced by a fork. Remove it from the oven and cool it slightly before scooping out the seeds.

While you’re waiting for the pumpkin to roast, grease an 8.5×4 inch loaf pan with olive oil and line with parchment paper along the long side so it hangs over (to make it easier to remove the cake later).

Once the pumpkin has cooled and you’ve scooped out the seeds, scoop the flesh into a large bowl and mash it. Take about 225 grams of that pumpkin and place it in another large bowl (you can save the rest in an airtight container in the freezer for future use). Add the sugar, maple syrup, eggs, and olive oil to the mashed pumpkin and whisk it until it’s combined.

In the bowl of a stand mixer, whisk together the brown rice flour, almond flour, baking powder, ground cinnamon, ground cardamom, and salt. Add the wet ingredients and mix until combined.

Use a spatula to place the mixture in your prepared pan and smooth the top. Sprinkle a teaspoon of sugar all across the top. Bake for about 50 minutes, or until the middle top of the cake springs back to the touch and a toothpick inserted in the middle comes out clean. Sprinkle a little more sugar on top when it comes out of the oven.

Allow the cake to cool completely before removing it form the pan. Enjoy!

Posted in Breakfast, Brunch, Cake, Gluten-Free | Tagged , , , , , , , , , | Leave a comment

Gluten-Free Apple Crumble Muffins

Growing up, I hated apples with a fiery, burning passion. I think it’s because most of what I tasted was the Red Delicious variety, i.e., the most popular one at U.S. grocery stores (at least during my formative years).

For those of you who are unfamiliar with Red Delicious apples, they’re the red ones that are essentially the cardboard cutout versions of real apples: They look good, but they taste like the insulation you fill the wall with. I have vivid memories of taking a bite out of a Red Delicious apple and gagging because it was so grainy and mealy.

I steered clear of apples for a while until I studied abroad in France. I went into a grocery store in the small town I was living in and got an apple for a snack. I wanted something to counteract the 90 crêpes and pastries I’d already eaten that day. I chose a Pink Lady apple. It was compact and firm in my hand. It had a nice sheen to it. I took a bite and realized what I’d been missing for years: Real apples are actually good. They are crisp, juicy, and refreshing. I filed this knowledge away and started to incorporate apples into my diet once I returned stateside.

I still buy apples at the grocery store (obviously, not Red Delicious), but these days, I mostly stock up on them at the farmers’ market. There are several varieties, but I’m a fan of the tart ones like Fuji, Honeycrisp, and Jonagold. The tart ones are better for baking because they’re a good contrast for all the sugar you put in pies, cakes, or muffins.

I used some diced tart apples for these muffins and mixed them with cinnamon, a little lemon juice, and sugar. I let them sit and marinate on the counter while I combined the other ingredients. The dry ingredients include ground nutmeg and ginger, two of my favorite spices to bake with in the fall. The wet ingredients have a ton of brown sugar, which is one of the best pairings with apples, in my humble opinion. I also topped the muffins with a brown sugar flour mix, which hearkens back to one of my favorite fall desserts, apple crumble.

These muffins smelled so good baking in the oven that it was almost surreal. I had a flashback to last weekend when I made cinnamon rolls with my friend Lynn. “I wish I could bottle up this smell,” I said to her at the time, and today, I wished I could do the same thing with the apple muffins. I guess the silver lining is, my apartment will smell like apple muffins for the rest of the day. Also, I can always make them again to recreate the memory.

I made these muffins gluten-free to accommodate my friend at work, but I’m sure you could make them with regular, all-purpose flour if you wanted to. I haven’t tested the recipe that way, but I would experiment with adding all-purpose flour in place of the gluten-free flour and keeping the almond flour, because I think that contributes to the texture.

Here’s a song to get you started on your apple crumble muffins.

Apple Crumble Muffins

Ingredients
For the apple filling:
2 tart apples, peeled and diced
2 Tbsp lemon juice
2 Tbsp granulated sugar
1 tsp ground cinnamon

For the crumb topping:
1/2 cup gluten-free flour
1/3 cup packed light brown sugar
1 Tbsp granulated sugar
1 tsp ground cinnamon
1/4 cup unsalted butter, melted and slightly cooled

For the muffin base:
1 3/4 cups gluten-free flour
2/3 cup almond flour
1 1/2 tsp baking powder
1/2 tsp baking soda
1/2 tsp Kosher salt
1/2 tsp ground ginger
1/4 tsp ground nutmeg
2 large eggs
1 cup light brown sugar
1/2 cup vegetable oil
1 cup whole milk yogurt

Directions

Preheat the oven to 425 degrees F. Line a standard muffin tin with liners and set aside.

First, make the apple filling. Toss the diced apples, lemon juice, sugar, and cinnamon together in a small bowl and set aside.

Next, make the crumb topping. Whisk together the flour, brown sugar, granulated sugar, and ground cinnamon. Drizzle in the melted butter and mix everything together with a fork. Make sure all the flour is incorporated but stop once you have big crumbs; you don’t want to over mix. Set aside.

Finally, make your muffin base. Whisk together the flours, baking powder, baking soda, salt, ground ginger, and ground nutmeg in a medium bowl. Set aside. In the bowl of a stand mixer fitted with the paddle attachment, beat together the eggs and brown sugar on medium speed until the mixture is light colored and fluffy. Turn the speed to low and slowly pour in the vegetable oil. Once that is incorporated, add 1/3 of the flour mixture. Then add 1/2 the yogurt. Continue this pattern until you don’t have any yogurt or flour left.

Use a rubber spatula to scrape the sides and bottom of the bowl, then give the batter one more quick mix. Use the same spatula to mix in the diced apples until they are incorporated.

Using spoons or an ice cream scoop (my preferred method), scoop some batter into each well in the muffin tin. Top generously with the crumble mixture.

Bake the muffins for 10 minutes at 425 degrees F. Then, turn down the oven temperature to 375 degrees F and bake for another 10 to 12 minutes, or until the tops are golden brown and spring back to the touch. You can also test them by inserting a toothpick in the middle. If it comes out clean, they’re done.

Cool the muffins for five minutes in the tin, then remove them to cool the rest of the way on a wire rack. Enjoy!

Posted in Breakfast, Brunch, Gluten-Free, Muffins | Tagged , , , , , , , , , , | Leave a comment

Peach Spice Muffins

A long time ago when I was living in Washington, DC, I was lamenting the end of summer to a friend. “I hate when summer is over,” I said. “Why?” she asked. “It happens every year.” Yeah, summer happens over and over again, but there’s still something about the end of the season that makes me wistful and nostalgic. Maybe it’s my sentimentality; maybe it’s my addiction to stone fruit. Whatever it is, I find myself in about the same position every year around this time.

Which brings to these muffins. I was a little nervous going to the farmers’ market this weekend because I thought peach season would be over. Much to my delight, Harvey Yoder from Yoder Farms still had peaches set out at his stand. I bought a pint with plans to make these peach spice muffins.

Peaches are versatile and lend themselves well to a lot of flavor combinations, but one of my favorites is cinnamon and ginger. “Ginger?” you might say. A lot of people associate ginger with fall…and I guess to some extent, they do the same thing with cinnamon. However, these spices are great year round and pair especially well with stone fruits. They add a little kick, and they contribute to that peach pie effect in whatever you’re baking. Honestly, these muffins are like peach pie in muffin form.

One of my favorite parts about baking is eating something that’s fresh out of the oven. There are few things better than taking something that’s still warm, unwrapping it, and devouring it almost one bite as it melts in your mouth. I did that about 20 minutes ago with these muffins and I’m still on cloud nine. I’m going to try to save the rest of these to bring to my coworkers tomorrow…but I’m not optimistic they all will make it.

A note about these muffins: If you want, you can leave off the turbinado sugar on top, but I’d highly recommend keeping it. I’ve written about this a lot on the blog, but turbinado sugar is one of my favorite things to add to baked goods. It adds a little crunch and has a rich flavor, kind of like maple syrup, so it pairs well with a lot of sweet ingredients. Plus, it’s fun to sprinkle on top of muffins, scones, or whatever else you’re about to put in the oven. Finally, I think it makes things look more artisanal. I kind of hate myself for just writing that, but it’s true.

ANYWAY. Enjoy these muffins! Here’s a song to get you started on your peach spice muffin journey. It’s probably an understatement to say I’m obsessed with the new Sabrina Carpenter album. This song gives me Joni Mitchell vibes.

Peach Spice Muffins

Ingredients

1 1/2 cups (195 g) all-purpose flour
3/4 cup (150 g) granulated sugar
2 tsp baking powder
1 tsp ground cinnamon
1/2 tsp ground ginger
1/4 teaspoon Kosher salt
1/3 cup (80 ml) neutral-flavored oil (I used avocado oil)
1 large egg
1/3 cup (80 ml) milk or non-dairy milk
1 1/2 tsp vanilla extract
1/4 tsp almond extract
1 cup finely chopped peaches
turbinado sugar for sprinkling on top

Directions

Preheat your oven to 400 degrees F. Line a 12-cup muffin tin with paper liners and set aside.

Whisk together your flour, sugar, baking powder, cinnamon, ginger, and salt in a large bowl. In the bowl of a stand mixer with the whisk attachment, whisk together the oil, egg, milk, vanilla extract, and almond extract. Mix in the dry ingredients on a low speed until just combined. Use a spatula to stir the mixture a couple times and make sure there’s no flour or wet ingredients at the bottom of the bowl. Add the peaches and gently fold them in until combined.

Fill the prepared muffin tin with batter and top each cup with a little turbinado sugar. Bake the muffins for 15-20 minutes, or until the tops spring back to the touch and are golden brown. You can also test them by inserting a toothpick in the middle. If it comes out clean, the muffins are done. Allow them to cool on a cooling rack. Store at room temperature in an airtight container. Enjoy!

Posted in Breakfast, Muffins, Uncategorized | Tagged , , , , , , | Leave a comment

Thé Time: Rasa Chai

I am bringing back my “Thé Time” column after four (!!!!) long years. I wouldn’t bring it out of retirement for anything that wasn’t really, really good. So, without further ado, I bring you Rasa Chai.

I found out about Rasa Chai a few weeks ago at work. As part of my new job, I’m scouting out stories about people at Washington University in St. Louis including alums who are making a difference in the region, whether it’s through service, innovation, entrepreneurship, education, or other areas. I heard about Shradha Challa, MBA 2024, who started Rasa Chai while she was a student at Olin Business School and has continued to grow her business since she graduated this past spring.

Shradha got the idea for Rasa Chai while she was taking an Intro to Entrepreneurship class at Olin. Her professor encouraged her to look for a problem she could solve with a new business. She started thinking about how difficult it was to find a cup of authentic chai in St. Louis.

“Here in the U.S., I can’t find one cup of authentic chai,” Shradha said in an article from Olin Business School. “And that’s how I came up with the idea for Rasa Chai. It started as my own problem, but the more I did research, the more I found that other people share this problem. There are so many South Asians here and they want the convenience of going and grabbing a chai somewhere.”

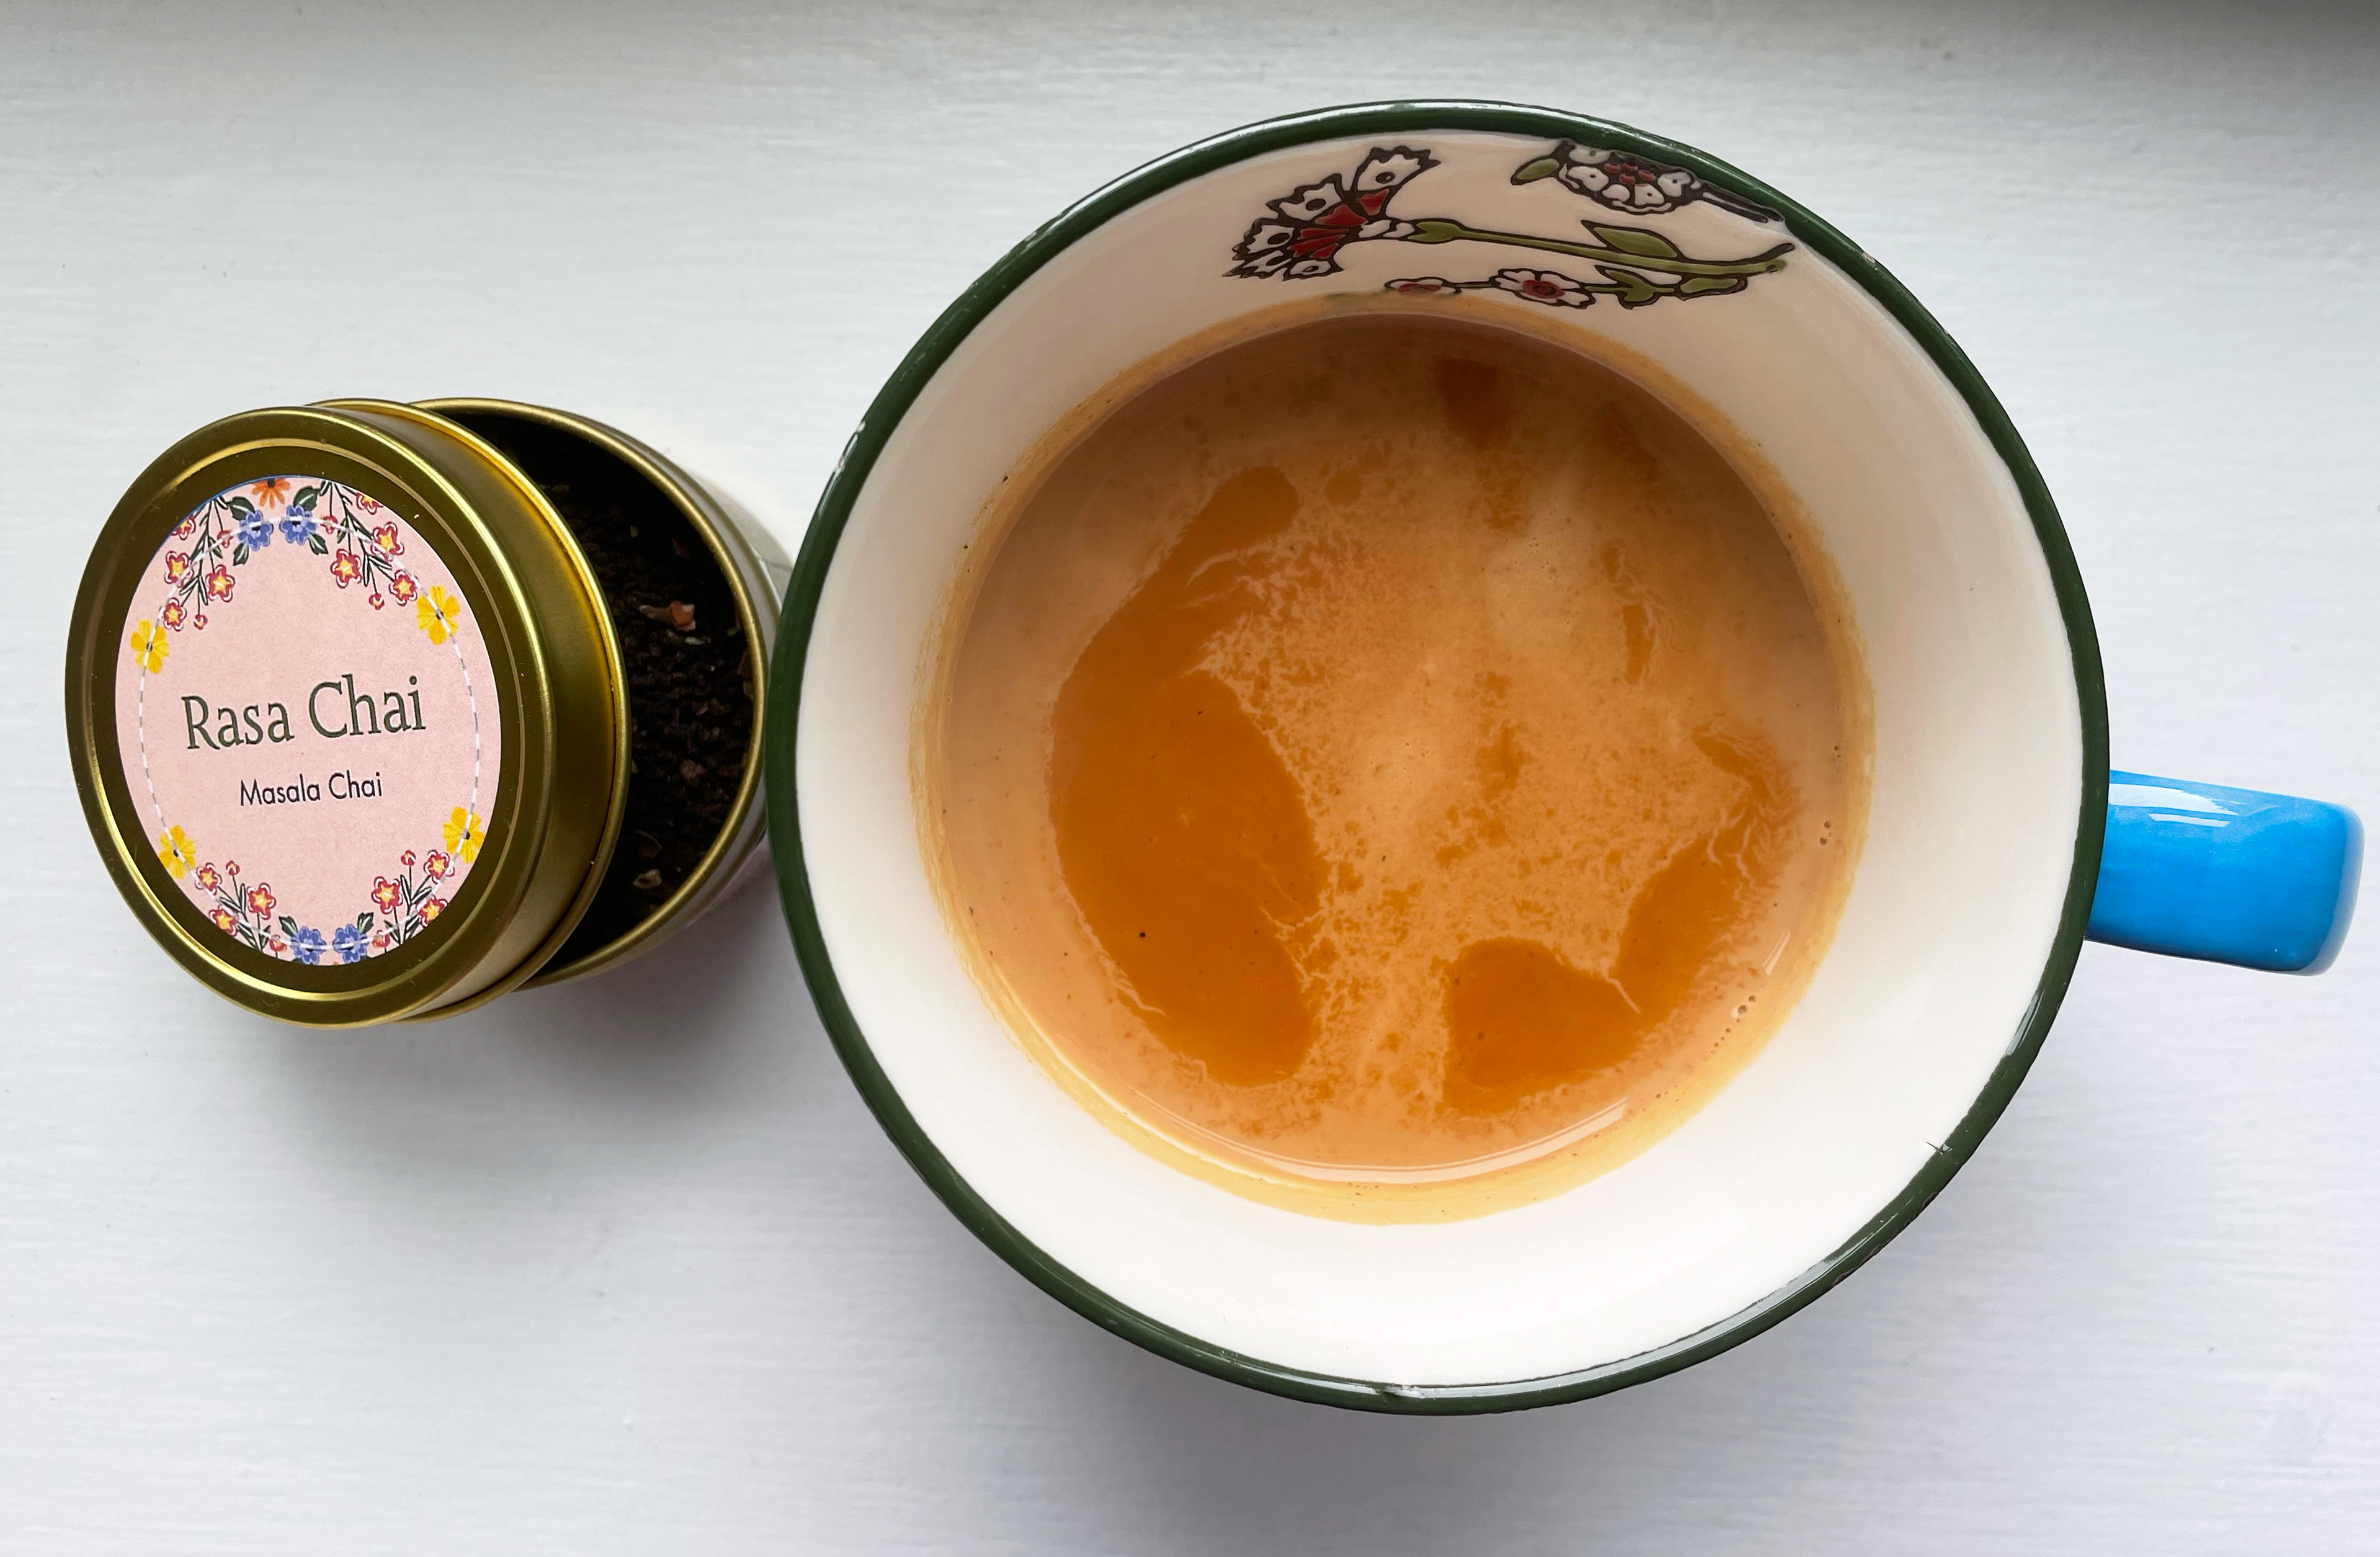
This inspired Shradha to start her business, which offers handcrafted chai blends in the most exquisite containers, as you can see in the photo at the top of this post. I ended up buying one a couple weekends ago at the University City Farmers’ Market, where Shradha was offering free samples, selling cups of freshly brewed chai, and selling containers of classic masala chai, which has cinnamon, cardamon, cloves, and fennel, and haldi chai, which is the same blend but with turmeric and ginger added in.

I tasted both blends and fell in love with the masala chai. It is fragrant, comforting, and delicious. It’s so good that I’m actually stepping away from writing this blog post for a second to go brew a cup. I’m not joking.

I think Shradha is right when she says it’s difficult to find a good cup of chai in the U.S. I pretty much gave up on buying it at a coffee shop or bakery, partly because I used to work at a bakery so I know what is done behind (semi) closed doors. So much of “freshly made” chai is actually a powder blended with milk, or, dare I say, worse: A syrup that is mixed into hot milk. I told a friend this recently when we were discussing chai and you could see a light bulb go off in her head. “Wow,” she said. “That’s why it doesn’t taste as good.”

Over the years, I’ve started to buy different loose leaf chai blends, which taste waaaay better than 90% of what you can buy at a coffee shop. I’ve found a few that I really like, including this one from Kolkata Chai Co. in New York, but Rasa Chai is my new favorite. Why? you might ask. Partly it’s because I can tell that the spices and tea are so fresh, and also, it’s very easy to make at home. Sometimes you find a loose leaf chai blend that tells you to mince and add two tablespoons of fresh ginger or go through a whole rigamarole to brew a cup. I don’t mind mincing ginger or doing a few extra steps to produce a really good beverage once in a while, but sometimes, I just want to drop a couple teaspoons of tea in hot water, brew it quickly, add milk, and call it a day.

That’s the beauty of Rasa Chai. As Shradha told me when I saw her at the market, all you have to do is add a little of the tea blend to hot water, brew it, add some milk, strain it, and then you have one of the best cups of chai you’ve ever had in your life. She probably didn’t say the very last part-I am editorializing-but it’s true.

Anyway, before I wax poetic about Rasa Chai for too long, I highly recommend that you go purchase some and try it for yourself. If you’re in St. Louis, you can also stop by the University City or Boulevard farmers’ markets on the weekend, where Shradha sells her chai. I guarantee that you will be impressed with the quality and flavor.

Posted in Thé Time | Tagged , , , | Leave a comment

Apricot Coffee Cake

Summer is my favorite time to bake, mostly because of the abundance of fresh fruit. Every Saturday morning, I go to the Tower Grove Farmers’ Market in St. Louis and see what’s available. Usually, I have to wait until later in the summer to find some of my favorite stone fruit (peaches, cherries, apricots), but this year, they’re in season early. I think I spent more on stone fruit yesterday than I do on my monthly yoga membership, which in some ways is comforting, and in others, horrifying.

However, it’s worth it because like I said, the fruit is so beautiful and delicious. When I saw the apricots at the Friedel Family Farm stand yesterday, I immediately knew what I was going to make: Apricot coffee cake.

Coffee cake is a vehicle for the best in-season fruit. You can pretty much throw anything into it and it will turn out well. Now that I’ve made this apricot version, I’m thinking of doing a riff with peaches and raspberries (a peach melba combination), or even one with fresh figs because those also looked-and tasted-good at the market this weekend. My friend William who owns Confluence Kombucha let me try a fig yesterday when I visited his stand, and I’m not sure if I was delirious from spending $50+ on fruit, or just really happy to be at the market, but they tasted better than they ever have before.

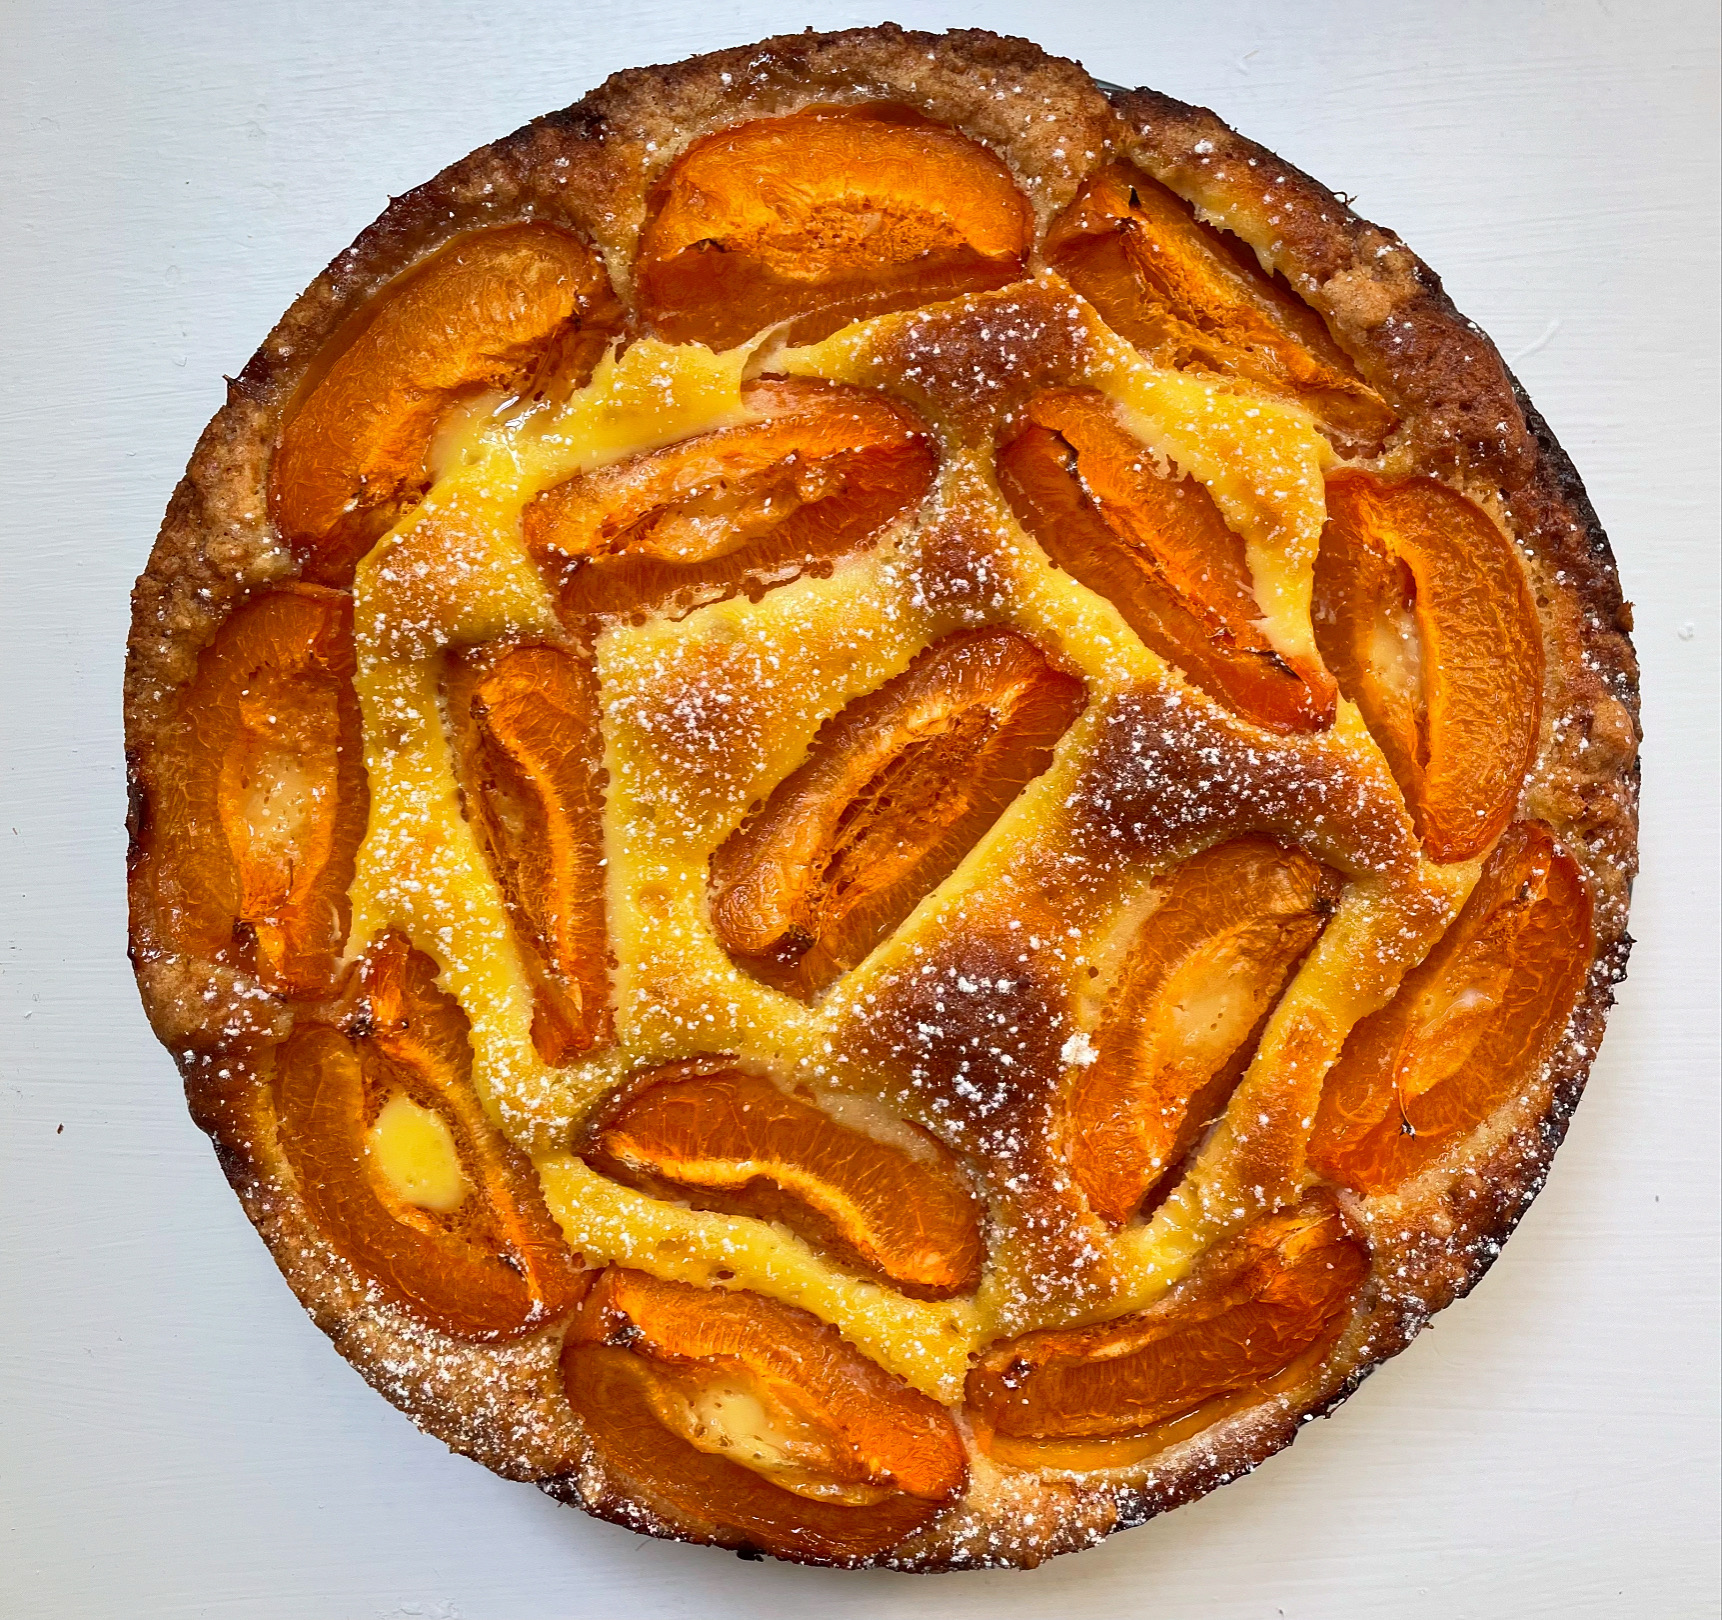
ANYWAY. Before I keep going on this tangent, I’ll get back to the coffee cake. It’s a very simple recipe that comes together quickly in the morning. You essentially mix some butter, flour, and baking powder together, throw in a little sugar, egg and milk, spread it in a pan, and top it with apricots and a little custard-esque mixture, and bake. It’s my favorite genre of baked good: One that looks super impressive but is deceptively simple to make.

You can serve the cake as is, or you can do what I did and dust a little powdered sugar on top. I’d actually recommend the powdered sugar because overall, the cake itself is not too sweet. I have a huge sweet tooth, so I thought the extra sugar was needed.

Here’s a song to get you started on your apricot coffee cake. This is the song of summer 2024, and I’m not taking any other nominations.

Apricot Coffee Cake

Ingredients

225 grams all-purpose flour
1 tsp baking powder
1/4 tsp Kosher salt
1/2 tsp baking soda
150 grams butter, plus more for greasing the pan
125 grams sugar
1 egg, lightly beaten
1 1/2 Tbsp milk
1 pint ripe apricots, quartered
1 Tbsp crème fraîche (you can substitute heavy cream and/or sour cream)
1 Tbsp sugar
1 egg
powdered sugar for dusting

Directions

Preheat your oven to 350 degrees F. Grease a 9-inch springform cake pan with butter and set aside.

In the bowl of a stand mixer fitted with the paddle attachment, beat together the flour, baking powder, baking soda, and salt on medium low until combined, or the butter is in little flakes. Add the sugar and beat the mixture again. Add the egg and milk and beat the mixture until it is just combined. It should be pretty thick. If it looks too dry, add a little bit more milk. Do not overmix.

Spread the batter into your prepared pan and place the apricots on top in a circle with the skin side down. Beat the crème fraîche, sugar, and egg in a small bowl until thoroughly combined, then pour it evenly on top of the batter.

Bake the cake for about 40 minutes or until it’s golden brown on top. Turn off the oven and let it sit in there for 10 more minutes. Let it cool completely before you sprinkle powdered sugar on top. Enjoy!

Posted in Breakfast, Cake | Tagged , , , , , , , , , , , , , , | 2 Comments

Sea Salt Chocolate Chip Cookies

l think when you really love to bake, you start becoming fixated on one particular aspect of it. Bread bakers are always striving for the perfect loaf. Cake makers are always looking for the perfect crumb and cake to frosting ratio. In my case, I’m constantly in search of the perfect chocolate chip cookie. This weekend, I set out to find it.

I’ve tried some really, really good chocolate chip cookies in my time, and I take notes as I eat them. I like the consistency to be soft but not too soft, the edges to be slightly crispy, and the chocolate to be gooey, melted, and luxurious. Through these observations, and through experimentation in my own kitchen, I’m moving one step closer to creating the best chocolate chip cookie recipe ever.

That’s where these sea salt chocolate chip cookies come in. I created a recipe this weekend that combined everything I knew about baking chocolate chip cookies with notes from ones I’ve tasted. I bought the best chocolate I could find, Valrhona, which was a splurge but totally worth it. You can taste the difference between cheap chocolate and the good, expensive kind. It’s like having a good glass of wine. You might settle for the cheap stuff sometimes, but you’ll never really enjoy it as much as when you get the quality bottle.

Also, I used flaky Maldon sea salt on top. I’ve done this before with chocolate chip cookies, but this time, I didn’t hold back. I’m a strong believer that salt makes a huge difference in chocolate chip cookies. It balances all the sweetness, and it adds more flavor to the cookies. I added a little pile on top of each cookie before it went into the oven.

Finally, I chilled the dough overnight. I sometimes skip this step, because honestly, who wants to wait a day for chocolate chip cookies? Also, I had a chef tell me once this step is completely useless. However, the more I bake chocolate chip cookies, the more I realize it’s really necessary for the best possible final product. I’m not a food scientist, so I’m not sure why chilling the dough helps. If I had to guess, it would probably be because it gives the dough a chance to meld together more and for the ingredients to settle before you put it in the piping hot oven. Either way, I’d recommend doing it because you’ll end up with a cookie with a near perfect consistency- soft, chewy, melty, and decadent.

One more thing I did that makes a difference is reserving some of the chopped chocolate for the tops of the cookies before they chill in the fridge. If you’ve ever wondered how fancy chocolate chip cookies get those decadent pools of chocolate on top, this is how. You can wedge the chocolate in the balls of cookie dough before you put them in the fridge to chill overnight. Then, they will melt down and sink into the cookies as they bake in the oven.

I’m going to keep playing around with ratios and ingredients this year, but this recipe is the closest I’ve gotten to finding the best chocolate chip cookie. I’ll keep you posted on my progress.

Here’s a song to get you started on your next chocolate chip cookie baking project.

Sea Salt Chocolate Chip Cookies

Ingredients

226 g unsalted butter (2 sticks), room temperature
100 g dark brown sugar
200 g light brown sugar
100 g granulated sugar
1 tsp vanilla extract
1 egg, room temperature
1 egg yolk, room temperature
196 g all-purpose flour
200 g bread flour
1 tsp baking soda
pinch of Kosher salt
4 oz good quality dark chocolate, chopped
flaky sea salt for topping

Directions

Combine the butter, sugars, and vanilla extract in the bowl of a stand mixer using a paddle attachment. Mix together until it’s light and fluffy. Add the egg and mix on low until combined, then add the egg yolk and mix until combined. Use a spatula to scrape down the sides as needed.

In a medium bowl, whisk together the flours, baking soda, and pinch of salt. Add to the bowl of the stand mixer and mix on low until just combined. Add most of the chopped chocolate and continue to mix until incorporated. I like to use the spatula at this point to scrape the bottom and the sides, and make sure everything is evenly incorporated.

Use a cookie scoop to scoop balls of dough onto a baking sheet lined with parchment paper. Top each dough ball with a little reserved chocolate, pressing it gently into the surface so it adheres to the cookie. Wrap the baking sheet in plastic wrap and place it in the fridge for at least eight hours or overnight.

When you’re ready to bake the cookies, preheat the oven to 338 degrees F. Line a new baking sheet with parchment paper. Place some of the dough balls on the sheet, leaving 2 inches between each of them, and sprinkle a healthy amount of flaky sea salt on top of each ball. Bake for about 15 minutes, or until the cookies are mostly set and starting to brown on top. Remove the oven and let the cookies cool on the sheet for a few minutes before carefully placing them on a wire rack to cool completely. Repeat the baking process until all your cookies are done. Enjoy!

Posted in Cookies, Dessert | Tagged , , , , , , , , , , , , , , | Leave a comment