Lemon Chia Granola

Screen Shot 2017-08-07 at 8.01.15 AM
Sunday was one of those rainy and depressing days when everything feels turned around. That’s probably why I made granola at 6 p.m.

But also, I really wanted lemon granola. I’ve been craving it since I finished a bag of Made Fare Co’s lemon blueberry granola. I used to buy a bag every weekend to last me through the week, but then I realized that I could save money by making my own.

The best part about this granola (besides how delicious it is) is how few ingredients it requires. Sometimes granola recipes call for all kinds of things, like aquafaba, brown rice syrup, or myriad ingredients that I don’t have in my kitchen. This granola recipe isn’t much more than oats, lemon zest, honey, and chia seeds. I pretty much always have those on hand.

A key part of this recipe is not touching the granola while it’s in the oven or after it comes out. That might be difficult to do if you’re like me and have low impulse control. But trust me, you’ll be glad you held back. The granola needs time to cool on the sheet before you break it up into clumps. It will be crunchier that way.

Screen Shot 2017-08-07 at 8.01.04 AMI had the granola for breakfast the last couple days with almond milk that I also made on Sunday. I topped it with blueberries, strawberries, and extra chia seeds but feel free to get creative. I bet blackberries or raspberries would also be delicious on top.

Here’s a song that came on in the car on the way to work this morning. It seemed prescient. It also made me forget about bumper-to-bumper traffic for a few minutes.

Lemon Chia Granola

Ingredients

2 cups old fashioned rolled oats
½ cup raw almonds, roughly chopped
1 Tbsp chia seeds
3 Tbsp extra-virgin olive oil
⅓ cup honey
zest of 1-2 large lemons
splash pure vanilla extract
2 pinches flaky sea salt

Directions

Preheat the oven to 325 degrees. Line a large baking sheet with parchment paper and set aside.

In a large bowl, combine the oats, almonds, and chia seeds. In a small bowl, mix together the olive oil, honey, lemon zest, vanilla extract, and salt. Pour the wet mixture in the bowl with the oats and mix until the oats are evenly coated.

Spread the oat mixture onto the baking sheet, pressing it down with a spatula so it forms one even layer. Bake sheet in the upper third of the oven for about 20 minutes. Turn the sheet and bake for another three to five minutes, or until the granola is golden brown.

Remove the baking sheet from the oven and let cool. Then break the granola into clumps. Store granola in a jar or airtight container at room temperature. Enjoy!
Posted in Breakfast, Uncategorized, Vegetarian | Tagged , , , , , , , , , , , , , , , | 1 Comment

Zucchini and Corn Skillet

Screen Shot 2017-08-08 at 7.51.05 AM
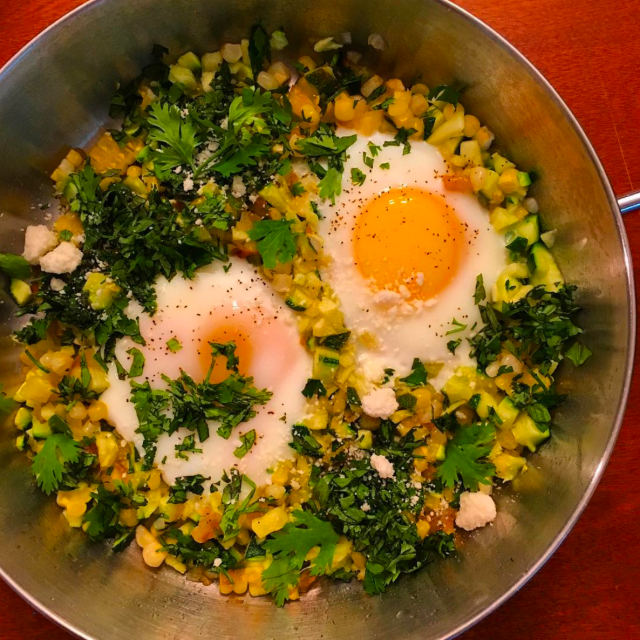
I’m a big fan of recipes that come together in one pan, partly because I like throwing a bunch of things into a skillet and watching how it comes together, and partly because I hate doing dishes.

This zucchini and corn skillet is one of the most delicious one-pan dinners I’ve made in a while. I bought almost all the ingredients for it at the farmers’ market on Saturday and let me tell you, it makes a HUGE difference.

If you’re going to make a simple dish, or one where the vegetables are center stage, I’d recommend doing the same thing. Canned corn or dried herbs won’t cut it, trust me.

A fun part of this recipe is making the eggs. You take a spoon and push the vegetable hash toward the sides until you have two shallow circles. Then you crack eggs into the wells, cover, and cook. I like to leave my eggs on until the whites are mostly set and the yolks are bright yellow, but feel free to cook them to your specifications.

Another thing that makes a big difference in this dish is cotija cheese. For those of you unfamiliar with cotija, it’s a Mexican cheese that’s similar to Parmesan. It pairs well with the cilantro in this dish and takes everything up a notch. I found myself sprinkling more on when I ate the second helping.

I guess this recipe could feed two people but I ended up eating everything in one sitting. That tends to happen to me with one skillet meals. I didn’t feel too bad about it because I was eating diced vegetables, but it’s always a strange feeling to eat something that originally said: “Serves 4.”

ANYWAY. Enjoy the skillet and the time it affords you. You won’t have to do as many dishes which is a huge plus in my book. Also, here’s a song to play while you’re cooking. It’s a classic in the making.

Zucchini and Corn Skillet

Ingredients

3 tsp olive oil
1/2 sweet yellow onion, minced
1 small zucchini, diced
1 ear of corn, kernels removed
2 large eggs
3 Tbsp cilantro leaves, minced, plus whole leaves for topping
3 tsp cotija cheese (or more)
salt and pepper to taste

Directions

Heat the olive oil in an 8-inch skillet over medium low heat. Once it’s hot, add the onion and sauté until it’s translucent, about 6 minutes.

Add the zucchini and corn to the skillet and mix to combine. Cook another 6 minutes until the zucchini is very soft.

Create two wells in the zucchini corn mixture by taking the back of a spoon and moving the vegetables toward the side of the skillet. Crack the eggs into the wells, reduce the heat on the stove to low, cover and cook. My eggs took about 5 minutes to cook but you can leave yours on longer or shorter, depending on how you like them.

Top the skillet with cilantro, cotija cheese, flaky sea salt, and pepper. Enjoy!

Posted in Breakfast, Dinner, Lunch, Uncategorized, Vegetarian | Tagged , , , , , , , , , , , , , , , , , | 1 Comment

Almond Milk

Screen Shot 2017-08-07 at 8.00.49 AM
I started drinking almond milk a few years ago in grad school after my friend Lyndsey told me about it. “It will make skim milk taste like dirty dishwater,” she said. That was enough endorsement for me.

Eventually, I stopped drinking regular milk except when I ordered cappuccinos or lattes. Even then, sometimes I’d sub in almond milk. I liked the nutty flavor and the fact that supposedly it’s better for you. I’m an advocate of regular milk but I also believe that subbing out extra dairy never hurts.

I bought almond milk at the grocery store until another friend of mine, Julicia, asked me if I made it myself. When I went to visit her one winter in Philadelphia she showed me how to do it. We bought a big bag of raw almonds, let them soak in water, and then blended them up in her Vitamix.

Julicia had me do a blind taste test with store-bought almond milk and the one we made. The one we made was much better. It tasted fresh, light, and more almond-y than the store bought kind. I told myself that I’d never buy almond milk again and that I’d only make it, but that was probably overambitious. Especially because at the time, I had a crappy blender than barely mixed frozen fruit.

Fast forward to now, when I have a high powered blender that sounds like it’s vacuuming the whole house when I turn it on. I realized that it was time for me to start making my own almond milk. On Saturday, I bought a bag of almonds and soaked a cup of them overnight in cool water.

Yesterday, I blended them up into milk. I decided against sweetening it because I add so many sweet things to milk, anyway. It still ended up tasting delicious. It has a splash of vanilla and a pinch of salt, which brings out the sweetness in the almonds. I put a splash of it in coffee yesterday and I put in homemade granola this morning (more on that later).

I guess there are a couple morals to this story. Listen to your friends’ advice, especially when it regards almond milk. Also, it’s never too late to start something new. I waited three years to make almond milk from scratch and now, I’ll make it all the time. Sometimes you just have to get over the initial barrier.

Here’s a song that reminds me of this almond milk. It has a slow progression but once it’s over, you’ll be glad you listened.

Almond Milk

Ingredients

1 cup raw almonds, soaked overnight in cool water
4 1/2 cups filtered water
1 tsp vanilla extract
pinch sea salt

Directions

Soak the almonds overnight in a big bowl filled with cool water. In the morning, drain the almonds.

Place them in a blender with water, vanilla extract, and a pinch of sea salt. Blend the mixture on the highest speed for a couple minutes, or until the almond milk looks uniform in the blender and there aren’t a lot of little pieces of almond floating around.

Place a cheesecloth or strainer over another bowl and pour the almond milk from the blender over the top. Then, funnel the strained milk into Mason jars or airtight containers. Refrigerate the milk. Enjoy!

Posted in Breakfast, Uncategorized | Tagged , , , , , , , , , , | 3 Comments

Grilled Halloumi and Corn Salad with Peaches

Screen Shot 2017-08-03 at 8.06.46 AM
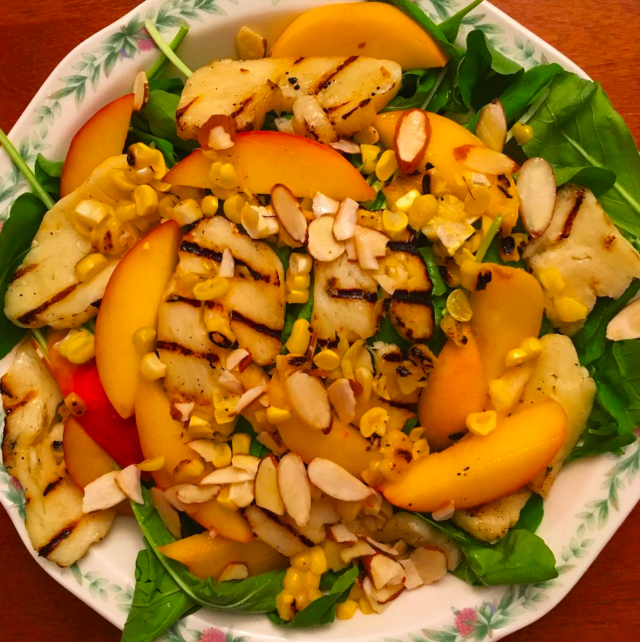
Summer, to me, says Halloumi.

It all started when I was living in D.C. Every summer, I’d buy a hunk of Halloumi cheese, slice it, fry it, and put it on salad. For a while it became my go-to meal (besides omelettes and toast). My first summer in the city, I made this blueberry Halloumi salad. It was pretty delicious.

Then I met a friend who had a grill at her apartment so I started cooking Halloumi that way. Don’t get me wrong: Fried Halloumi is delicious. But grilled Halloumi takes things to the next level. Picture salty, almost briny cheese, combined with a rich, smoky flavor. The outsides get slightly crispy and the insides are melty and gooey. Just writing about it makes me want to fire up the grill.

For this salad, I also grilled an ear of corn. I sprinkled the kernels on top a bed of baby spinach leaves and added peaches for sweetness and almonds for crunch. I only used a drizzle of olive oil and a squeeze of lemon juice for dressing.

Sometimes people are surprised when I tell them that I only dress a salad with lemon and olive oil. I do it partly because I don’t want to make dressing and partly because if the ingredients are fresh, that’s all a salad needs. I’d rather let the other flavors shine than bury them in dressing.

ANYWAY. Make this salad as soon as possible. If you don’t have a grill, you could just fry the Halloumi and add the corn kernels without cooking them. However, I’d highly recommend finding someone with a grill and getting them to let you use it. Aside from improving the flavors in this salad, there’s something very cathartic about firing up a grill and cooking things. It’s sort of like driving or biking. Once I find my rhythm I could do it for hours.

Here’s a song that reminds me of this salad. It’s sweet, spunky, and the perfect amount of dangerous.

Grilled Halloumi and Corn Salad with Peaches 

Ingredients

1 package of Halloumi cheese, sliced into 1/2-inch rectangles
1 ear of bicolor corn, husk pulled down and tied
2 cups baby spinach leaves
1 peach, sliced into wedges
1/2 cup sliced almonds
olive oil and fresh lemon juice for dressing

Directions

Fire up the grill. Place the Halloumi cheese segments and corn directly onto the metal rungs. Cook for a few minutes and then check to make sure that the sides of the cheese and the corn are getting evenly singed. Turn the cheese over once it has grill marks. Keep an eye on things because the cheese will cook quickly.

Once the cheese and corn are done cooking, remove from the grill and set aside. Place baby spinach leaves in a bowl and top with peach and almonds. Remove the kernels from the corn cob and scatter over the spinach leaves. Top with Halloumi, a squeeze of fresh lemon juice and a drizzle of olive oil. Enjoy!

*A great way to remove kernels from a cob is to take a large bowl and place the cob diagonal with the pointed tip facing up toward you. Run a knife down each side of the cob to remove the kernels. It’s kind of like shaving…so be careful! Make sure to angle the knife away from your body/fingers and run the sharp edge downward when you’re cutting the corn.


Posted in Dinner, Lunch, Uncategorized, Vegetarian | Tagged , , , , , , , , , , , , , , , , , , , , | Leave a comment

Heirloom Tomato Tart with Roasted Corn and Basil

Screen Shot 2017-08-02 at 8.10.27 AM
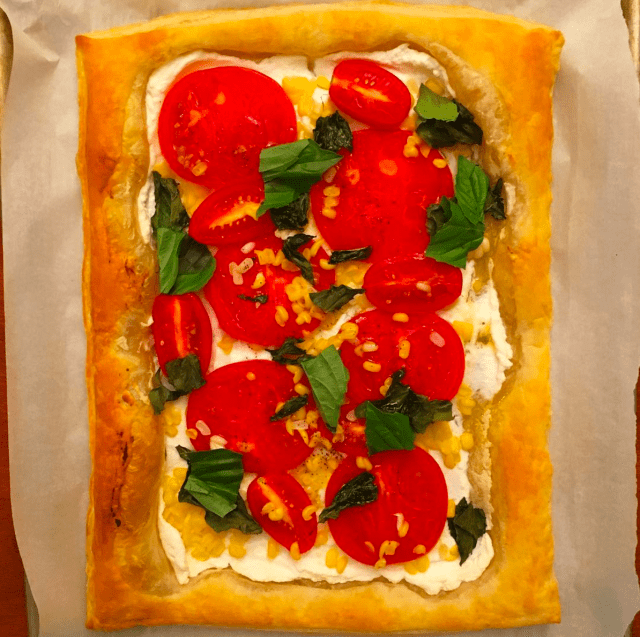
This is one of those dinners that looks super intimidating to make but is actually really easy. All you need is an oven and puff pastry.

You’ll also need tomatoes, basil, corn, ricotta, and cotija, but I’ll get to that later. The puff pastry is the star of this dish. It sets the foundation and ties all the other ingredients together.

I held off making this tart for a while because I was intimidated by puff pastry. As it turns out, I had no reason to fear. It’s so easy to use.

Go the the grocery store and buy puff pastry in the frozen aisle. Plan on spending a little more money for the good stuff. I bought Dufour, which I’d *highly* recommend. It creates a flaky, buttery crust that’s so good, you’ll forget it was ever frozen.

To make this tart, defrost the puff pastry overnight in the fridge. By the time you get home from work (or whatever else you’re doing), it will be soft but still cold. Place it on a floured surface and lightly run a rolling pin over the top, just to make sure you’ve flattened it completely.

Top the pastry with ricotta, cotija, farmers’ market tomatoes, corn, and torn basil. I was originally just going to use ricotta but then, at the last minute, I added cotija. I’m happy I did. It gives the cheese a little kick and it complements the tomatoes, corn, and basil. The flavors remind me a little of enchiladas that I like to make every spring.

Pop the tart in the oven and wait until the sides get bubbly and golden brown. The most difficult part of this recipe is waiting for the tart to cool before you eat it. Technically you’re supposed to wait 10 minutes. I think I lasted about five minutes. As I’ve said before, I’m not really into delayed gratification.

ANYWAY. Make this tart as soon as possible. It’s easy, delicious, and deceptively impressive. I could see making it for a dinner party and basking in the “oohs” and “aahs,” when really all I did was roll out some pastry dough and scatter ingredients on top. A key to making the tart delicious is using fresh ingredients, though. Getting the best pastry crust, cheese, tomatoes, and vegetables will take the tart to the next level.

Here’s a song I discovered the other day. It’s good for mornings when it feels like Thursday but it’s only Wednesday. I’d also recommend it as a track for driving down the highway at high speed with the windows rolled down.

Heirloom Tomato Tart with Roasted Corn and Basil 

Ingredients

1 pack of frozen puff pastry, defrosted
2 heirloom tomatoes
1 ear bicolor corn, kernels removed
1/2 cup basil leaves, divided and roughly torn
1/2 cup ricotta cheese
1/4 cup cotija cheese
olive oil for drizzling
sea salt and pepper for sprinkling

Directions

Preheat your oven to 400 degrees F. Line a baking sheet with parchment paper and set aside.

Turn out the puff pastry dough onto a floured work surface and run a rolling pin over the top a couple times, just to make sure the dough is flat.

Transfer the dough to the parchment paper-lined baking sheet. Top with ricotta, cotija, tomatoes, corn kernels, and half of the torn basil leaves. Make sure you leave about 2 inches between the toppings and the edge of pastry (this will be your crust). Drizzle the top with olive oil and sprinkle with sea salt and pepper.

Place the tart in the oven and bake for about 15 minutes, or until the edges are puffed and golden brown. Remove from the oven and let cool for 10 minutes before serving. Enjoy!

Posted in Dinner, Lunch, Uncategorized, Vegetarian | Tagged , , , , , , , , , , , , , , , , , , | 1 Comment

Fresh Strawberry Smoothie Bowl with Cashew Granola, Cacao Nibs, and Coconut

Screen Shot 2017-08-01 at 8.09.26 AM
I accidentally made the best smoothie bowl of my life this morning. I say “accidentally” because it wasn’t on purpose. I guess deep down, I knew what I was doing.

It all started when I got near the coffee machine in the kitchen and something smelled like maple syrup. I’m not sure what, because I haven’t made pancakes or french toast for a while. I suddenly got a craving for maple syrup. The problem was, I’d already started making a smoothie bowl. I had strawberries, almond milk, and yogurt in a blender. At the last minute, I poured in a couple tablespoons of maple syrup.

When I tasted the resulting mixture I swooned. “Whoa,” I thought. “This is the best smoothie I’ve ever made in my life.” That seemed extreme because I’ve made A LOT of smoothies in my day, but it’s true. It was also confusing because essentially, all I’d done was add maple syrup to strawberries and milk.

But cooking is all about subtle flavor combinations. The rich flavor in the maple syrup brought out the sweetness in the strawberries. I added some cacao nibs, cashew granola, and coconut on top for crunch. Writing about it makes me want to eat it all over again.

Until then, I’ll leave you with this recipe. Also, here’s a song I’ve been jamming out to recently. It’s good for weeks when you forget your wallet and don’t realize it until you get to the grocery store checkout aisle, days when you wish that you were closer to vacation, or pretty much whenever.

Fresh Strawberry Smoothie Bowl with Cashew Granola, Cacao Nibs, and Coconut 

Ingredients

1 cup fresh strawberries
1 cup frozen strawberries
1 cup unsweetened almond milk
2 Tbsp nonfat Greek yogurt
2 Tbsp maple syrup
cashew granola (I like Milk + Honey’s mix), cacao nibs, and shredded coconut for topping
sliced strawberries for topping

Directions

Blend the strawberries, almond milk, Greek yogurt, and maple syrup in a blender on high until smooth. Pour into a bowl and smooth out the top with a spoon.

Top the smoothie with granola, cacao nibs, shredded coconut, and sliced strawberries. Enjoy!

Posted in Breakfast, Smoothie Bowls, Uncategorized, Vegetarian | Tagged , , , , , , , , , , , , , , , , , , | Leave a comment

Like Home/Comme À La Maison

Screen Shot 2017-07-28 at 9.43.41 AM
Like Home/Comme À La Maison is closed for construction this week and I miss them. So I figure now is as good a time as any for me to tell you about them.

I read about Like Home right after I moved back to St. Louis this past winter. Marie-Christine and Clémence Pereur, a mother daughter duo from France, own the café and run everything. When I started going to Like Home in the spring, they were the only two people working the front and back. Now they have extra staff in the front of house.

They need those extra people working the front because business is BOOMING, as it should be. Clémence is a trained pastry chef and her creations are as beautiful as they are delicious. I have a hard time deciding what to get every time I go in, but I usually come out with at least two macarons.

This slideshow requires JavaScript.

The macarons come in all different flavors. Since I started going to the café, I’ve sampled blueberry, mascarpone, hibiscus, lemon, and a new specialty, maple bourbon bacon, which combines a bunch of my loves into one, quarter-sized cookie. The macarons are so good that whenever I eat them, they remind me of France. I’m back in Orléans, hoarding piles of macarons from my local pâtisserie. The best part is, I didn’t even need to buy a plane ticket.

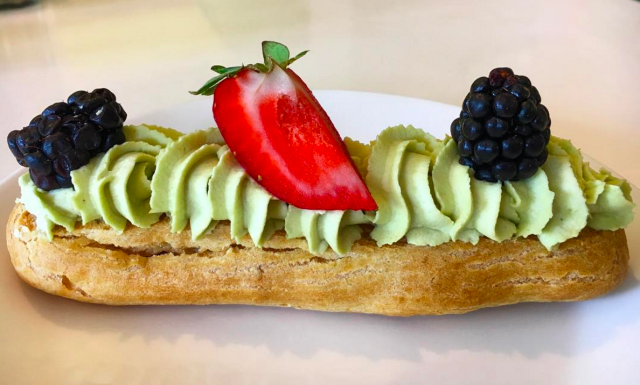
Like Home also offers other traditional French pastries like éclairs. One day they had a pistachio cream-filled éclair that was good, I started weeping. This is not an exaggeration. I hid my face from Marie-Christine and Clémence because I’m not sure how French it is to cry over your pastries.

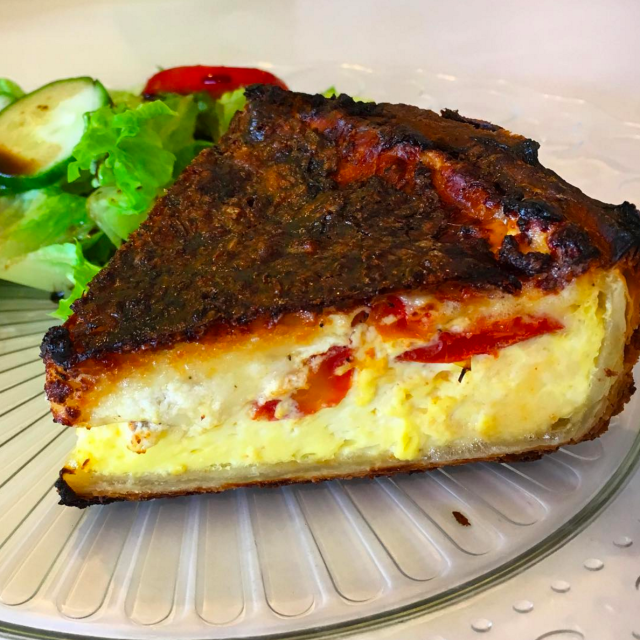
Screen Shot 2017-07-28 at 9.44.08 AMEven though the sweets are a main draw at Like Home, you shouldn’t forget about the savory options. The menu is full of traditional French lunch dishes including quiche, tartines, or open-faced sandwiches, and “les croques,” or the French version of ham and cheese sandwiches.
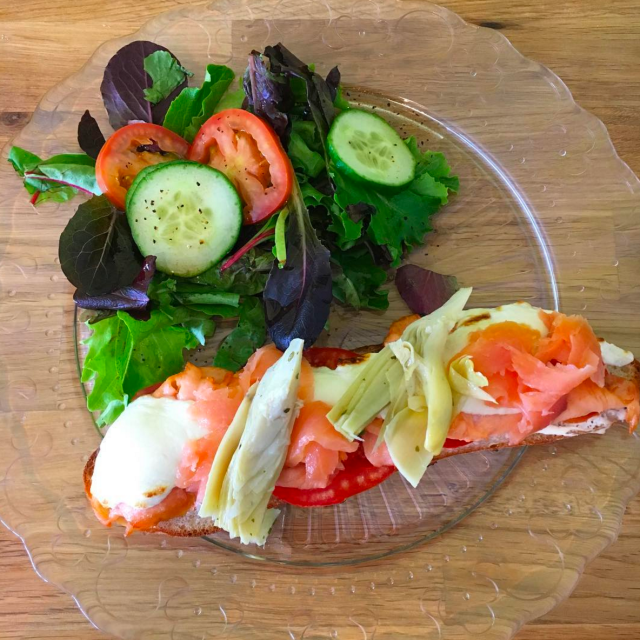
Screen Shot 2017-07-28 at 9.45.41 AMMy favorites are the vegetarian quiche and the tartine saumon, or open-faced sandwich with smoked salmon, cheese, and artichoke. Both of those come with a side salad that is always fresh and lightly dressed with balsamic. This also reminds me of France because unlike in the U.S., where side salads are often of the watery, bagged variety, the salads at Like Home are made from real greens. When I eat one, it makes me feel a little better about consuming my body weight in pastries afterward. Not that I felt too bad about it in the first place.
ANYWAY. If you’re in St. Louis and you want to experience the most authentic French bakery in town, I would highly recommend stopping by Like Home. Clémence is often out front (even though now, with the extra help, she stays busy making things in the back), and she is warm and friendly. The food is always fresh and delicious, and the pastries are vachement bonne, as the French would say.

Like Home usually has French music playing on the speakers in the café. Here’s a song that reminds me of eating there (and makes me want the construction to end sooner so I can get macarons).


Posted in Restaurant Reviews, Uncategorized | Tagged , , , , , , , , , , , , , , , | Leave a comment

Golden Milk Chia Pudding

Screen Shot 2017-07-26 at 8.57.23 AM
I’d never heard of golden milk tea until this past winter, when I saw it on the menu at a local coffee shop. I ordered a golden milk tea latte and it was love at first sip.

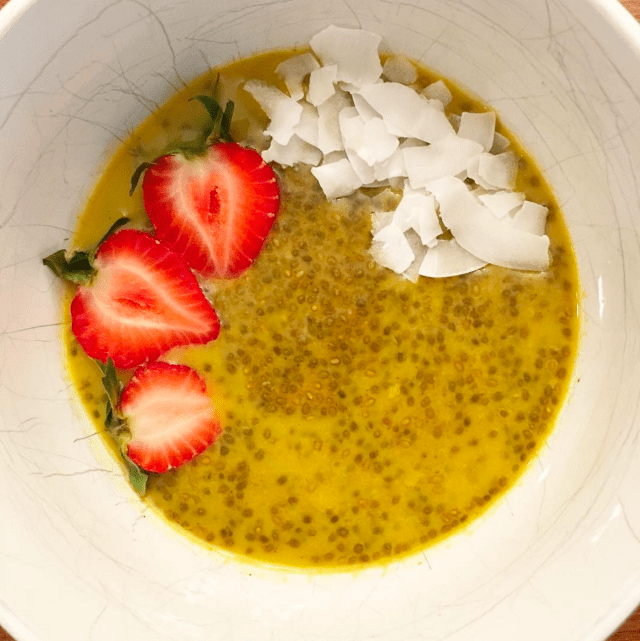
For those of you unfamiliar with golden milk, it’s basically turmeric powder, cinnamon, a little sweetener mixed in a plant-based milk. You can heat it up in a latte or drink it iced. Or, you can make golden milk chia pudding.

A word to the wise: Be careful of how much cinnamon you add into the milk at the beginning of the recipe. Turmeric is very vibrant (that’s how golden milk gets its bright yellow color) but even a pinch too much cinnamon will make the milk look like a muddy rain puddle.

I topped my pudding with sliced strawberries and coconut, partly because I liked the way the colors looked together and partly because I knew they would taste good together. Feel free to get creative, though! I bet blackberries and pistachios would also work well.

Also, you can use whatever plant-based milk you want for the recipe. I used almond milk but I’m thinking about using coconut milk next time. I bet it would make the yellow color pop even more.

Here’s a song to get you started on your golden milk journey (that sounded oddly prophetic). It’s never failed me in times of need.

Golden Milk Chia Pudding (serves 2)

Ingredients

2 cups almond milk
1/2 tsp turmeric powder
1/4 tsp cinnamon powder
1 Tbsp honey
4 Tbsp chia seeds
strawberries and coconut shavings for topping

Directions

Add the almond milk, turmeric powder, cinnamon, and honey to a saucepan and bring to a rapid boil. Reduce heat and simmer for a couple minutes.

Pour the mixture through a mesh sieve into a bowl. Stir in the chia seeds and let the mixture cool slightly. Pour it into a jar or airtight container and seal. Place in the refrigerator overnight. In the morning, top with fresh strawberries and coconut shavings. Enjoy!

Posted in Breakfast, Uncategorized, Vegan, Vegetarian | Tagged , , , , , , , , , , , , , , , , | Leave a comment

Honey Lavender Ice Cream

Screen Shot 2017-07-25 at 10.51.55 AM
The past couple weeks of my life could be known as: “Lavender on Everything.” I’m fine with that.

In this installment, I decided to combine honey and lavender in ice cream. It was a test of patience and resolve, because I’m very into immediate gratification. I knew the recipe would take a lot of time but I was confident that the reward would be worth it.

I wasn’t wrong. I came home last night after a long day and I was so happy that there was a tub of lavender honey ice cream waiting for me in the freezer. I probably could have eaten it all, but I stopped myself. I wanted to try to make a good thing last.

This ice cream also got some colorful comments on Instagram. One person said that he thought the lavender buds on top were ants. Another person asked how I stay so small when all I do is eat ice cream. In response to those: No way I would let ants touch this ice cream. And lots of running, hiking, and walking. Sometimes I eat salad.

One of my friends said this picture looked like a butt:Screen Shot 2017-07-25 at 10.52.19 AM
ANYWAY. Make this honey lavender ice cream as soon as possible. It’s the perfect treat to get you through a Monday or any day when you need extra motivation.

Here is a song that reminds me of this ice cream. It’s sweet with a little kick. It wakes you up.

Honey Lavender Ice Cream

Ingredients

2 cups heavy cream
1 cup half-and-half
2/3 cup mild honey
2 tablespoons dried edible lavender flowers
2 large eggs
1/8 teaspoon salt

special equipment: a candy or instant-read thermometer; an ice cream maker

Directions

Bring cream, half-and-half, honey, and lavender just to a boil in a large saucepan over moderate heat, stirring occasionally. Remove pan from heat and let the mixture steep, covered, for about 30 minutes.

During this time, you can prepare an ice bath for later. Fill a large bowl with ice and cold water, allowing enough room for another bowl to sit on top. Make sure the bowl on top is small enough to fit and is centered.

Once the cream mixture is done steeping, pour it through a fine-mesh sieve into a bowl, using the back of the spatula to press the lavender flowers to extract more flavor. Place the mixture in a large saucepan and heat until it gets very hot.

In the meantime, make the custard. Whisk together the eggs and salt in a large bowl, and add 1 cup of the hot cream mixture slowly, whisking as you go. Pour the egg and cream mixture into the saucepan and cook, stirring constantly with a spatula or wooden spoon, until the mixture coats the back of the spatula/spoon and the temperature on a candy thermometer or instant read thermometer reaches 170-175 degrees F.

Pour the custard into the top bowl in the ice bath and cool completely, stirring every so often. Cover and chill overnight.

The next day, put an airtight storage container in the freezer. Freeze the custard in an ice cream maker. You’ll know when the ice cream is done when it starts pulling away from the sides, the paddle in the middle starts clicking, and a finger placed in the ice cream leaves an indentation (kind of like a footprint in the snow).

Use a spatula to scoop the ice cream into the cold storage container and place in the freezer for a few hours (or overnight) to firm up. Enjoy!

Posted in Dessert, Ice Cream, Uncategorized | Tagged , , , , , , , , , , , , , | Leave a comment

Elote with Chili Rub and Cotija Cheese

Screen Shot 2017-07-24 at 7.47.08 AM
I used to hate grilled corn. When I was little, my family would go strawberry picking at a local farm during the summer and we’d always get lunch there afterward. My sister would order corn on the cob wrapped in tinfoil and I’d always go for frozen custard with strawberries on top. I didn’t understand how she preferred corn to ice cream until last night.

Elote, or Mexican grilled corn, is better than every other type of corn. I say that with 100 percent confidence. It’s smoky, spicy, sweet, tangy from the lime juice, and delicious with cotija cheese. It’s so good that I could have eaten four in a row. Unfortunately, I only had two cobs.

A word to the wise: Buy kitchen string for this recipe. I forgot so I ended up putting the husks directly on the grill. It worked for a while until parts of the husk started getting super charred and falling into the bottom of the grill. Then, one of the cobs caught on fire. I guess the experience taught me how I’d react in an emergency, because I stayed calm and actually patted the fire out with an oven glove.

It all ended up working out. The fire gave the cobs more smoky flavor and brought out the sweetness in the corn. Charred corn is the best corn.

Another key element to this dish is the chili rub. It might freak some people out to rub mayonnaise on corn, but let me tell you, it’s worth it. I mixed some ground chili into mayo and spread it on the cobs once they were done grilling.

The spicy mayo does a lot of things, including adding spice, making it easier for cotija cheese to stick to the outside of the cobs, and bringing out the smoky flavor in the corn. It also tastes really good with lime juice.

So yeah. The moral of this story is, any food that you hated as a child can be transformed into something you like. Well, maybe not ANY food, but most food. I used to think that corn was bland until I charred it on the grill. Now, I want to eat corn on the cob every night for dinner.

Here’s a song that I’ve been jamming out to lately. My sister told me about Jay Som last week and I’ve been listening to this song on repeat. The bridge gives me chills.

Elote with Chili Rub and Cotija Cheese 

Ingredients

2 cobs of corn, husks pulled down and tied with kitchen string
vegetable oil for brushing cobs
1/4 cup mayo
1 tsp chili powder
2 Tbsp cotija cheese
lime wedges for serving

Directions

Fire up the grill. Brush the cobs with vegetable oil until they’re evenly coated. Place them on the grill and allow them to cook for about 10 minutes. Check them every so often to make sure that they’re not burning and that the sides are grilling evenly. Turn them with kitchen tongs to make sure every side gets part of the flame.

In the meantime, make the chili rub. Combine the mayo and chili powder in a small bowl.

Once the corn is brown and slightly charred (or more charred if you like it that way), brush it with the chili rub, sprinkle cotija cheese on top, and squeeze lime juice on top. Enjoy!


Posted in Dinner, Uncategorized, Vegetarian | Tagged , , , , , , , , , , , , , , , , , , , , | Leave a comment